Join the AI Workshop and learn to build real-world apps with AI. A hands-on, practical program to level up your skills.
The NavigationView view is a very important view, and one you’ll use all the time.
NavigationView {
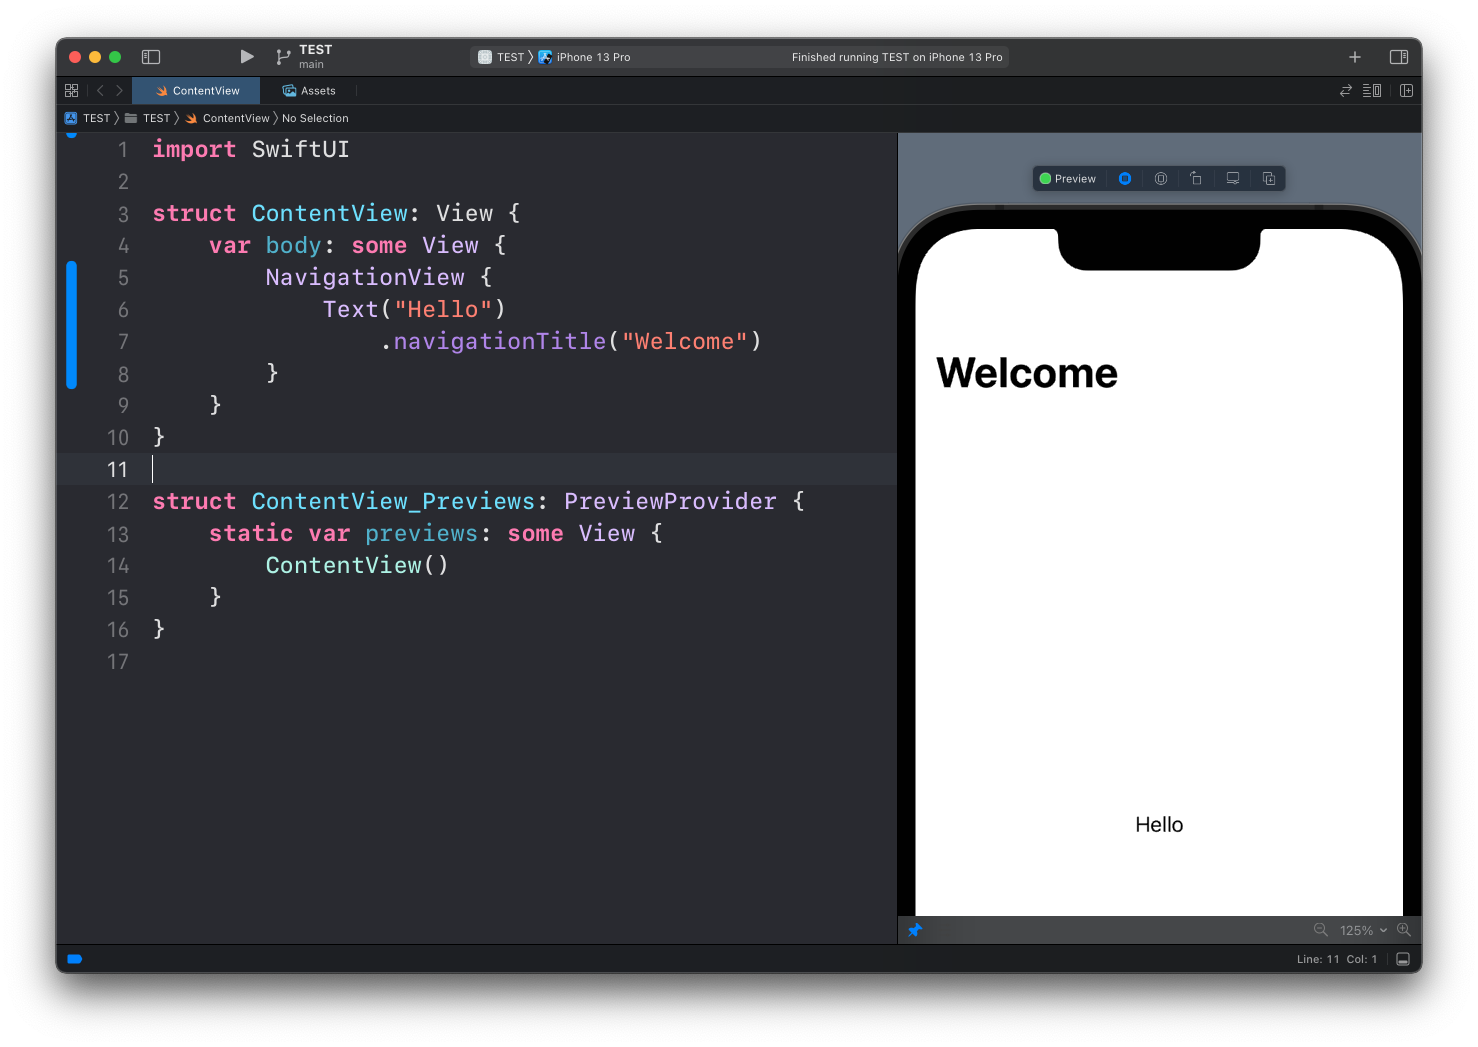
}Once you wrap a view in a NavigationView, you can add a title to the view with the navigationTitle() modifier:
NavigationView {
    Text("Hello")
        .navigationTitle("Welcome")
}
The main benefit, however, is that now we can make views be links that bring the user to other views.
First we create another view. You can add it to the same file or to another file in your project:
struct ThanksView: View {
var body: some View {
Text("Thanks for checking out the app!")
}
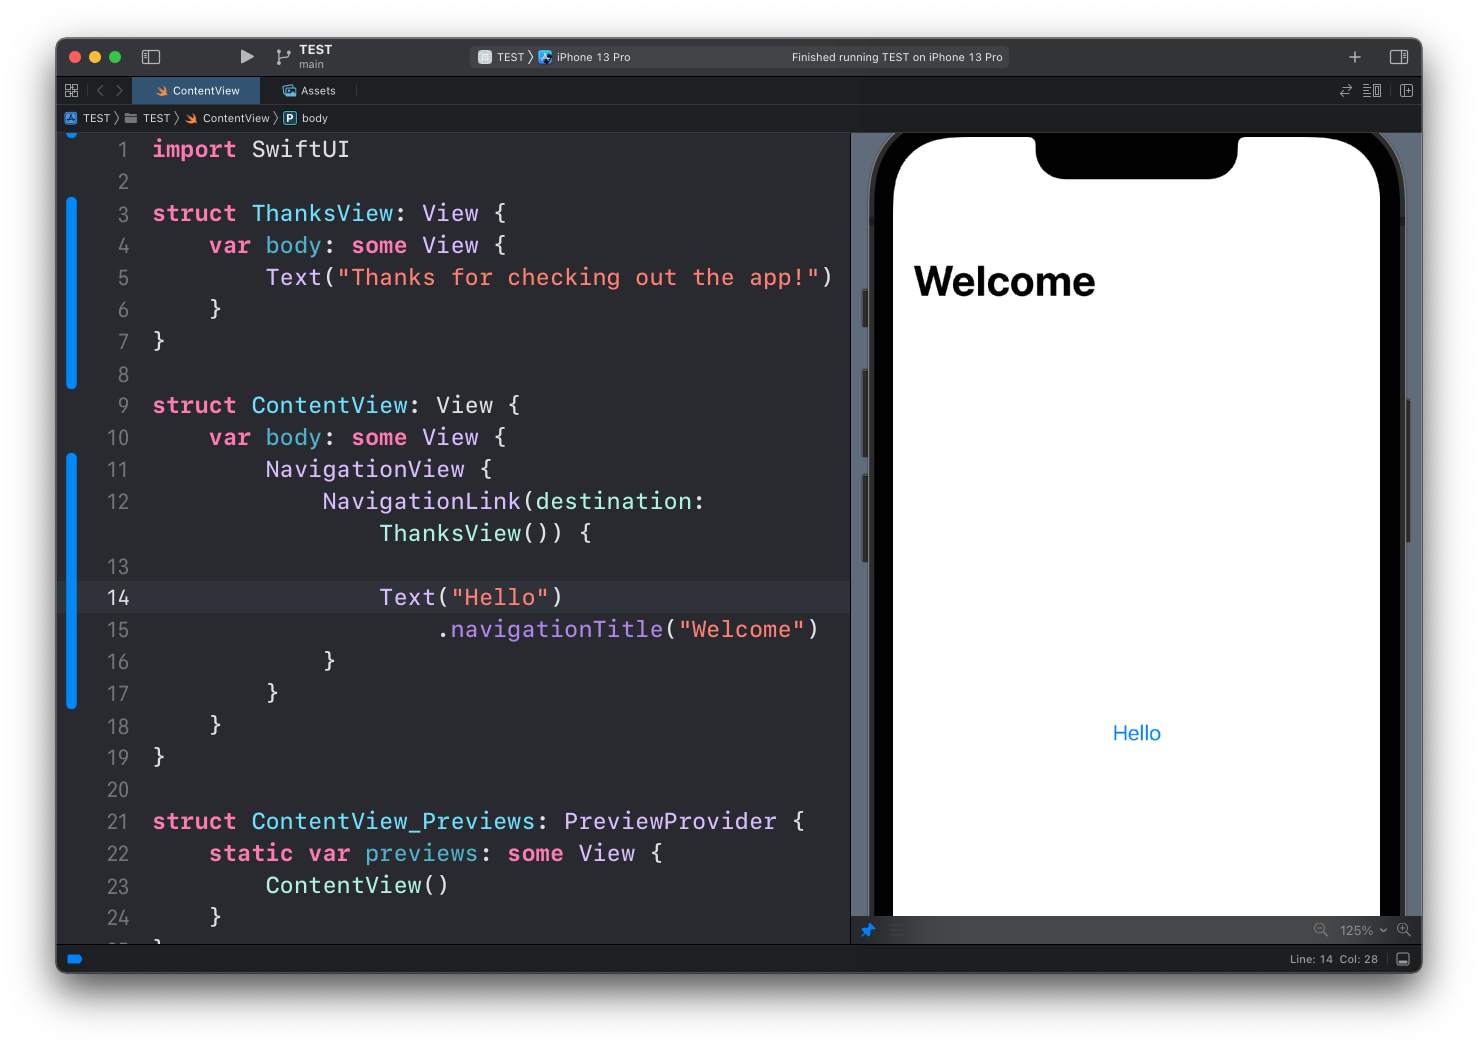
}Then, wrap the “Hello” Text view into a NavigationLink view, where we set the destination parameter to ThanksView:
NavigationView {
    NavigationLink(destination: ThanksView()) {
        Text("Hello")
            .navigationTitle("Welcome")
    }
}
Now a lot of things happen automatically: the “Hello” text turns blue and becomes tappable:
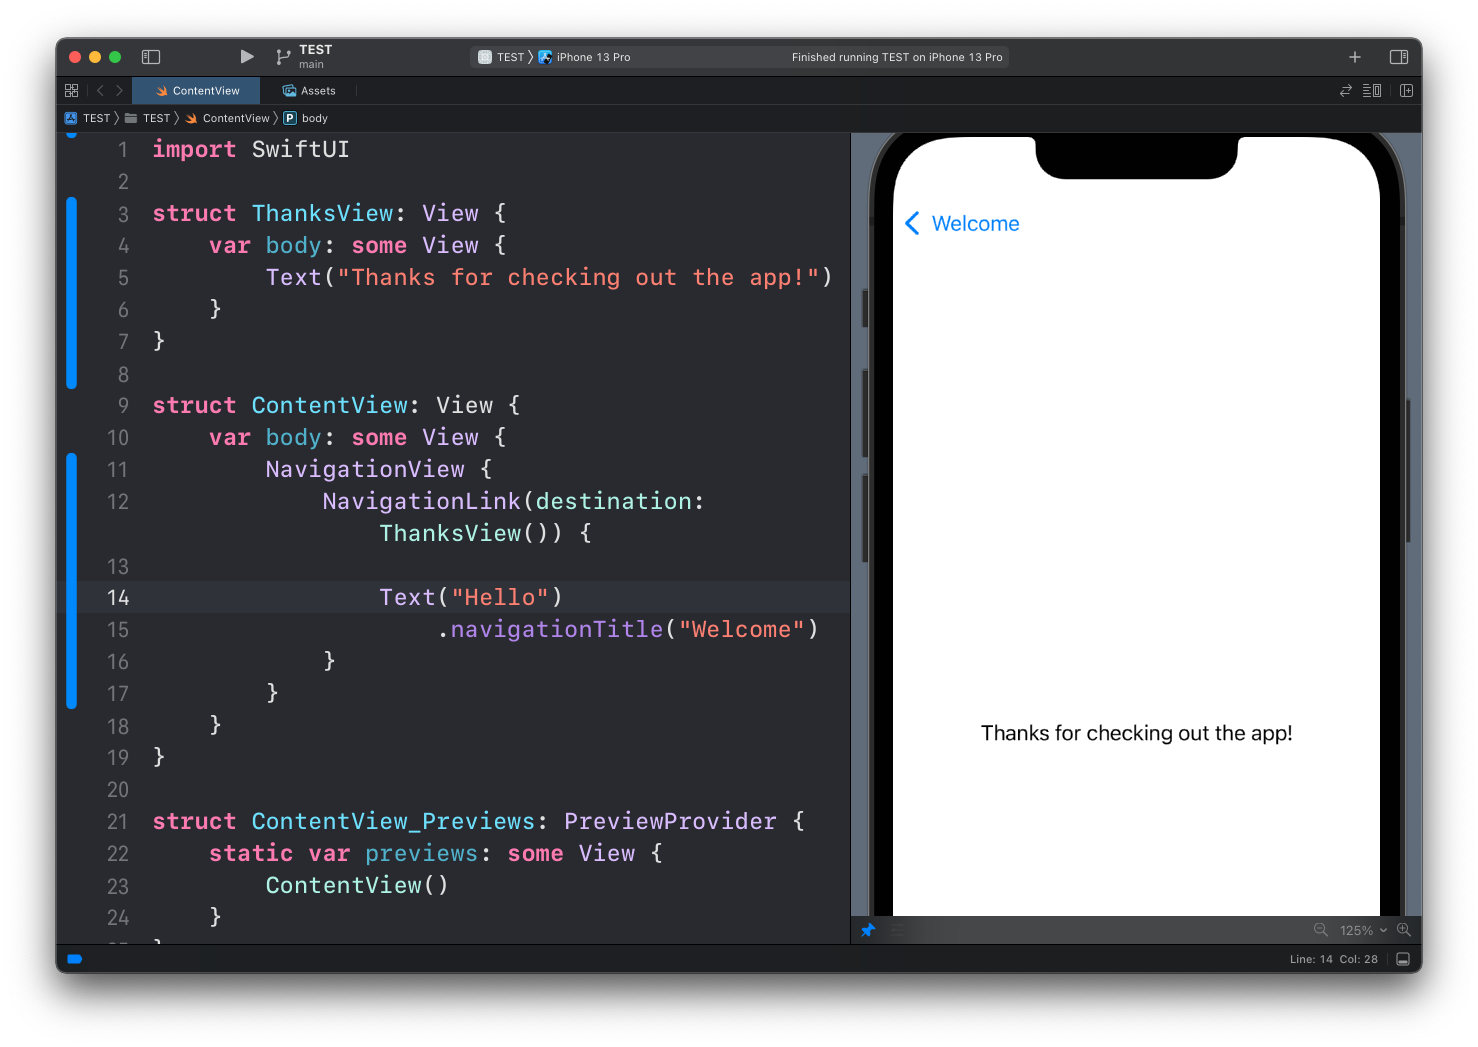
And once we tap on it, we’re shown the ThanksView and a link to get back to the original view. The text shown in the top left button comes from the navigationTitle modifier we set:
Here’s the full code used in the example:
import SwiftUI

struct ThanksView: View {
    var body: some View {
        Text("Thanks for checking out the app!")
    }
}

struct ContentView: View {
    var body: some View {
        NavigationView {
            NavigationLink(destination: ThanksView()) {
                Text("Hello")
                    .navigationTitle("Welcome")
            }
        }
    }
}
That’s one way to navigate between views, and I’d say the simplest one.
Sometimes before navigating to another view you want to perform some action. In this case, we can have a boolean property showThanks that we can set to true when we want the ThanksView to appear. We do so when the user taps a button:
struct ContentView: View {
    @State private var showThanks = false

    var body: some View {
        NavigationView {
            VStack {
                NavigationLink(destination: ThanksView(), isActive: $showThanks) {}

                Button("Hello") {
                    showThanks = true
                }
                .navigationTitle("Welcome")
            }
        }
    }
}
The app looks exactly the same as before, but now when the user taps the button, we can do something, like logging the transition or anything else:
Button("Hello") {
    showThanks = true
    print("Transitioned to ThanksView")
}
Remember that
print()does not log in preview mode, only in the Simulator.
Lessons in this unit:
| 0: | Introduction |
| 1: | ▶︎ NavigationView |
| 2: | TabView |
| 3: | SF Symbols |
| 4: | Forms |
| 5: | TextField in Forms |
| 6: | Toggle in Forms |
| 7: | Slider in Forms |
| 8: | Stepper in Forms |
| 9: | Picker in Forms |
| 10: | DatePicker in Forms |