Join the AI Workshop and learn to build real-world apps with AI. A hands-on, practical program to level up your skills.
I had a simple use case.
I was building a job board and it was time to build the form to submit a new job offer.
The recruiter can enter the company details, the job details, and the company logo image.
The data is stored in the database, and at first I tried to store the logo in the database, but after a while I realized that while technically ok, I had some issues with storing the binary data and it was taking too long for the task. So I said, “ok let’s just upload it to S3”.
S3 is one of the wonderful services provided by AWS. Since I already use AWS for other things, adding an S3 bucket is easy.
So I went to create an S3 bucket.
I already had an AWS account. If you don’t, start here: https://aws.amazon.com.
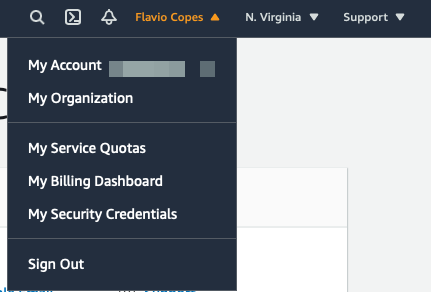
Once you have an account set up, create an IAM user in AWS. Log in to AWS, click your name at the top, then “My Security Credentials”.
On the sidebar click “Users”, and “Add user”. Enable “Programmatic access”.
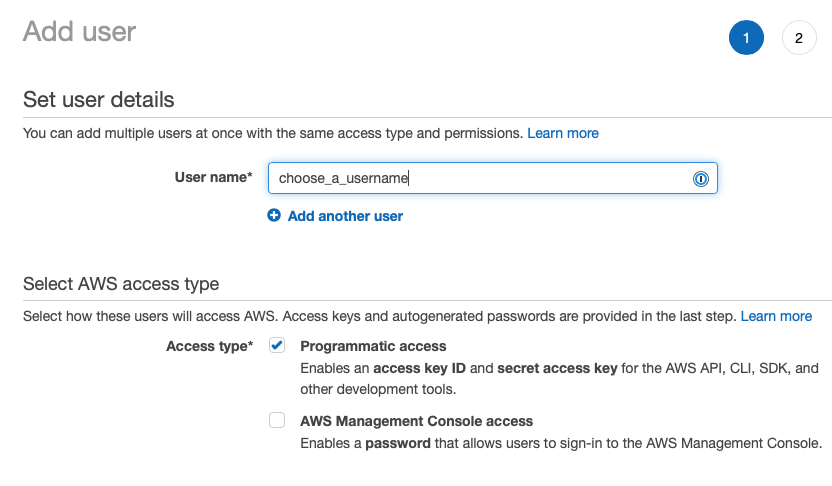
Move to the next screen via the buttons you find in the bottom of the page (“Next: Permissions”).
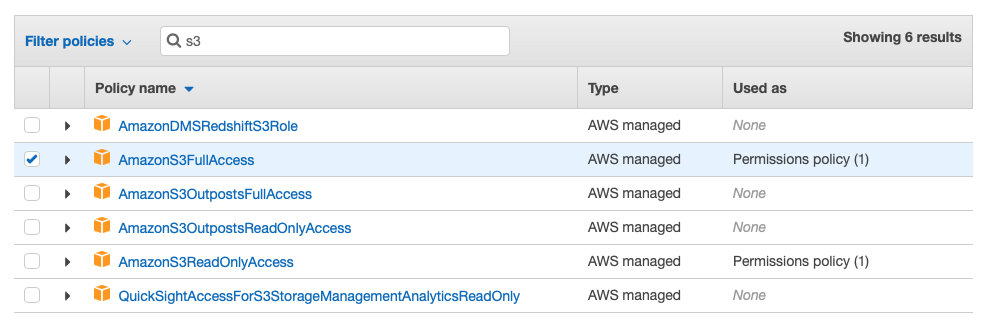
Click the “Attach existing policies directly”:
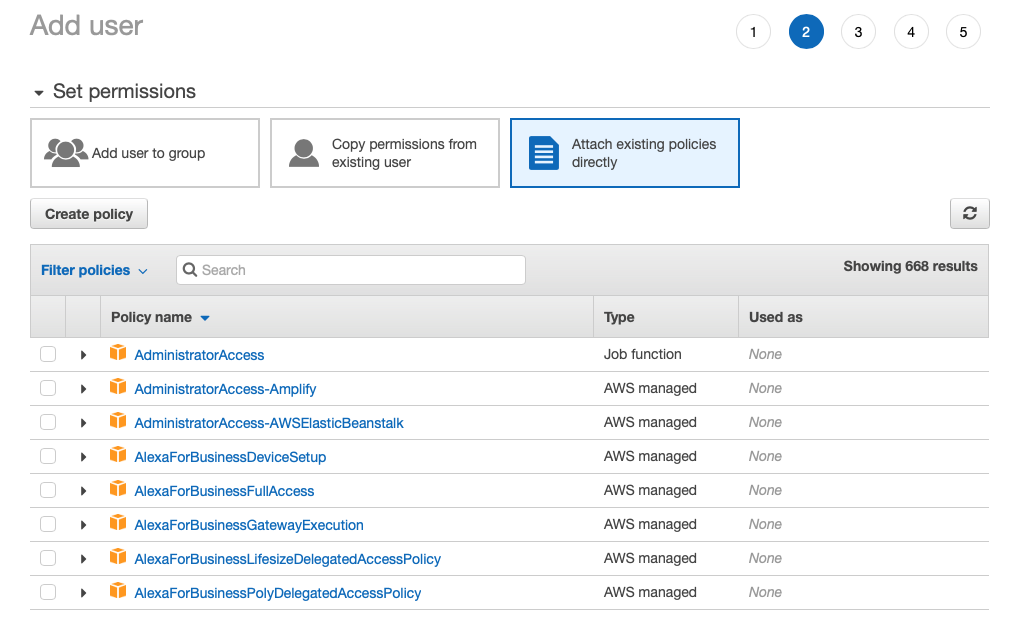
Type “S3” in the filter to show the S3 policies
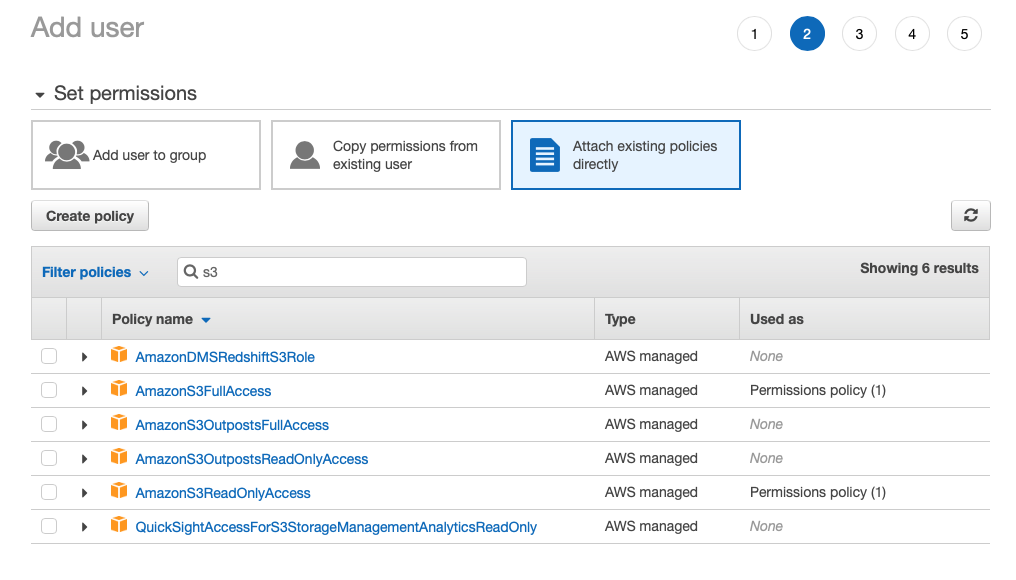
Select the AmazonS3FullAccess permission:
Once the user is created, you’ll have a pair of access key ID and secret access key. Copy those to your .env file in the project you have, or store them somewhere so you can use them later.
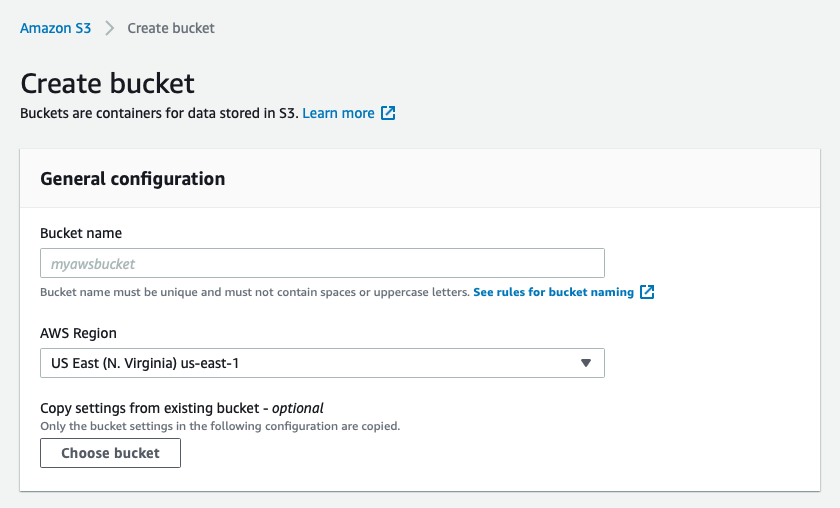
Next, go in S3 and create a bucket. From the S3 homepage https://s3.console.aws.amazon.com click the “Create bucket” button.
Set a name, choose an AWS region, disable “Block all public access” (we’ll get to permissions in another post) and click the Create bucket button at the bottom of the page.
Done! Now it’s time to dive into Node.js. I use this code in Next.js, server side, in an API call.
First install the aws-sdk package with npm install aws-sdk.
As mentioned, store your AWS access codes in .env:
AWS_ACCESS_KEY_ID=<the access key>
AWS_SECRET_ACCESS_KEY=<the secret>
AWS_BUCKET_NAME=<the bucket name>
Add
import AWS from 'aws-sdk'on top.
Then initialize the s3 object with:
const s3 = new AWS.S3({
  accessKeyId: process.env.AWS_ACCESS_KEY_ID,
  secretAccessKey: process.env.AWS_SECRET_ACCESS_KEY
})
When you want to upload a file, load it from disk:
const filename = 'the-file-name'
const fileContent = fs.readFileSync(filename)

const params = {
  Bucket: process.env.AWS_BUCKET_NAME,
  Key: `${filename}.jpg`,
  Body: fileContent
}

s3.upload(params, (err, data) => {
  if (err) {
    reject(err)
  }
  resolve(data.Location)
})