Join the AI Workshop and learn to build real-world apps with AI. A hands-on, practical program to level up your skills.
For the longest time I’ve had an Automator script to convert images to JPG.
It’s something I do all the time, because the difference between PNG images and JPG for some things is huge. It depends on the image.
Sometimes converting an image to JPG can mean a 5x reduction in size in some cases. In other cases, not really. With big images, it’s worth a try.
(PNG is nicer because of transparent background, but there’s a balance between file size and beauty).
macOS Monterey, the latest macOS version, comes with a tool that’s basically going to replace Automator in the future, I think, and has been available in iOS and iPadOS for some time: Shortcuts.
I’ve never used this app on those platforms. I never had the need to do anything fancy.
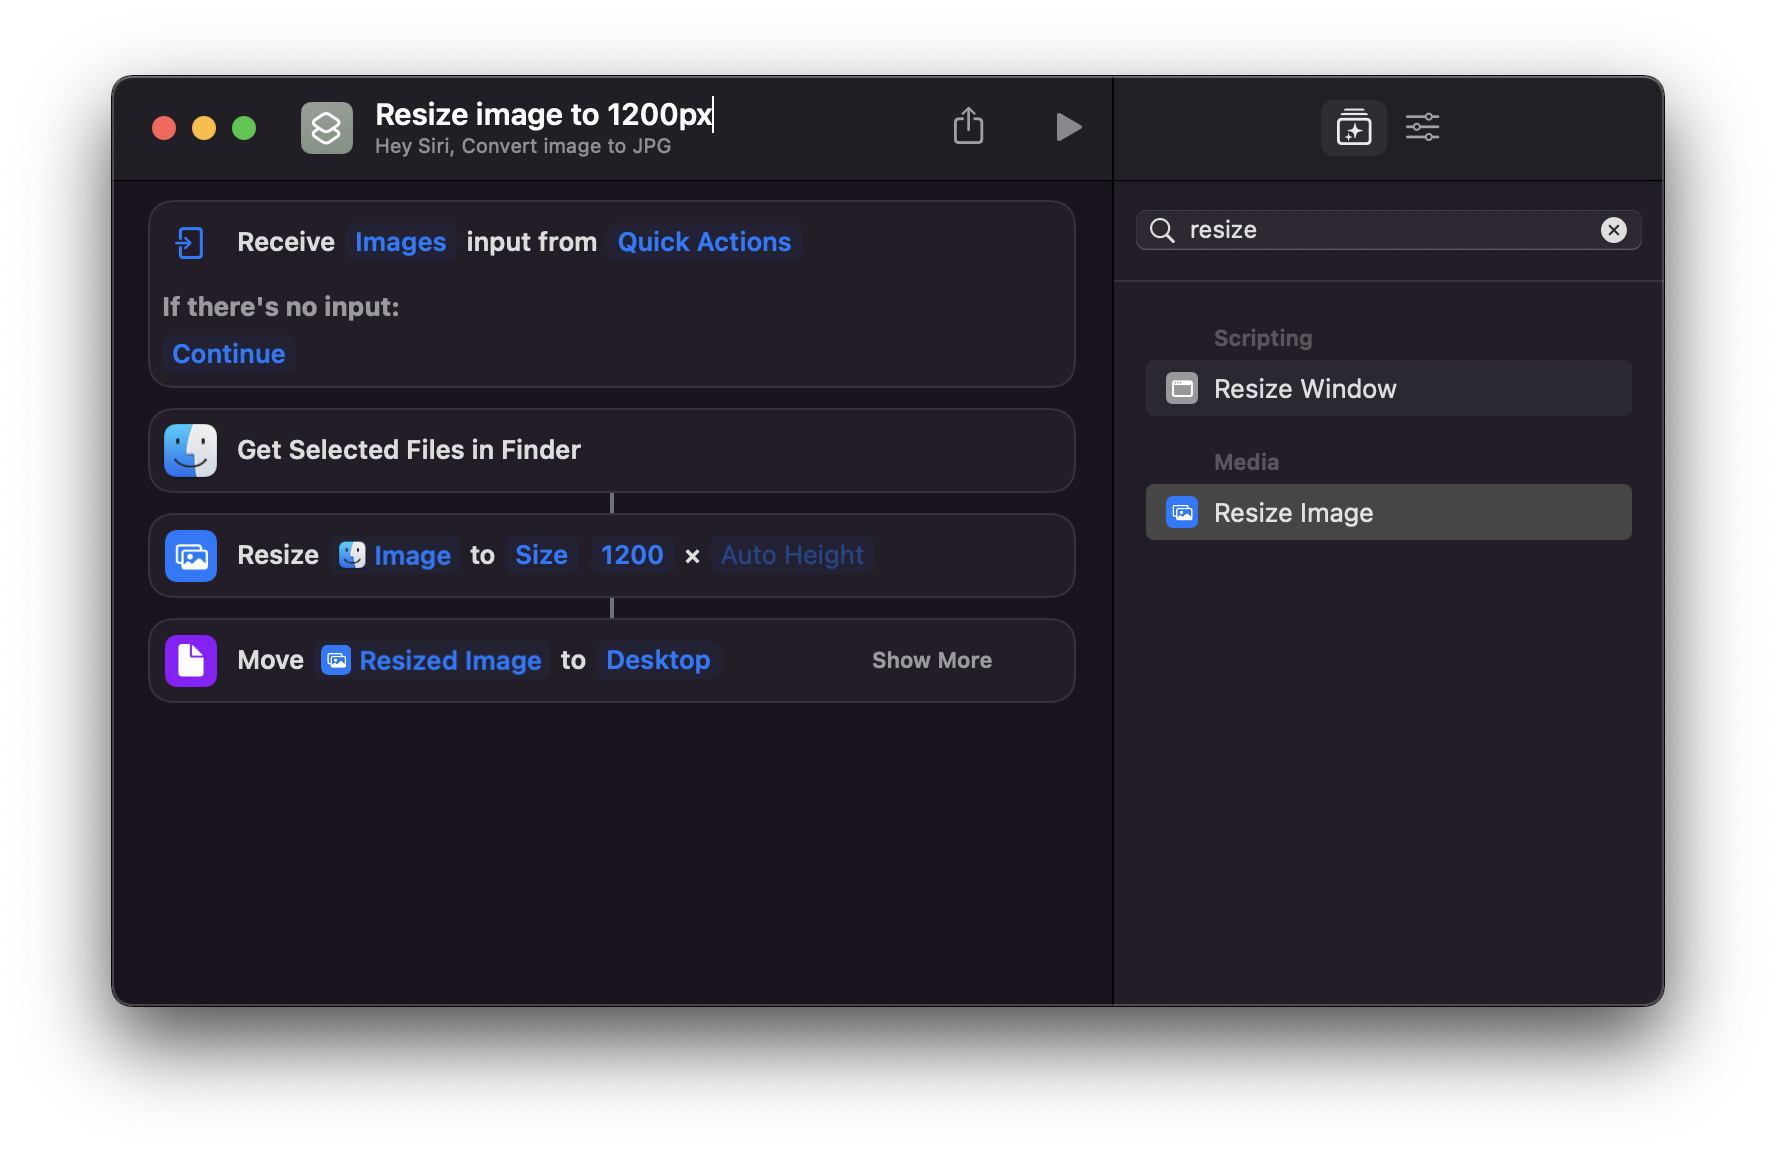
But since moving to a new Mac, I decided to re-do my little automations. I don’t have many. I just have this one to convert any image to JPG, and another one to resize the images to 1200px.
In this post I want to describe how to do the first one.
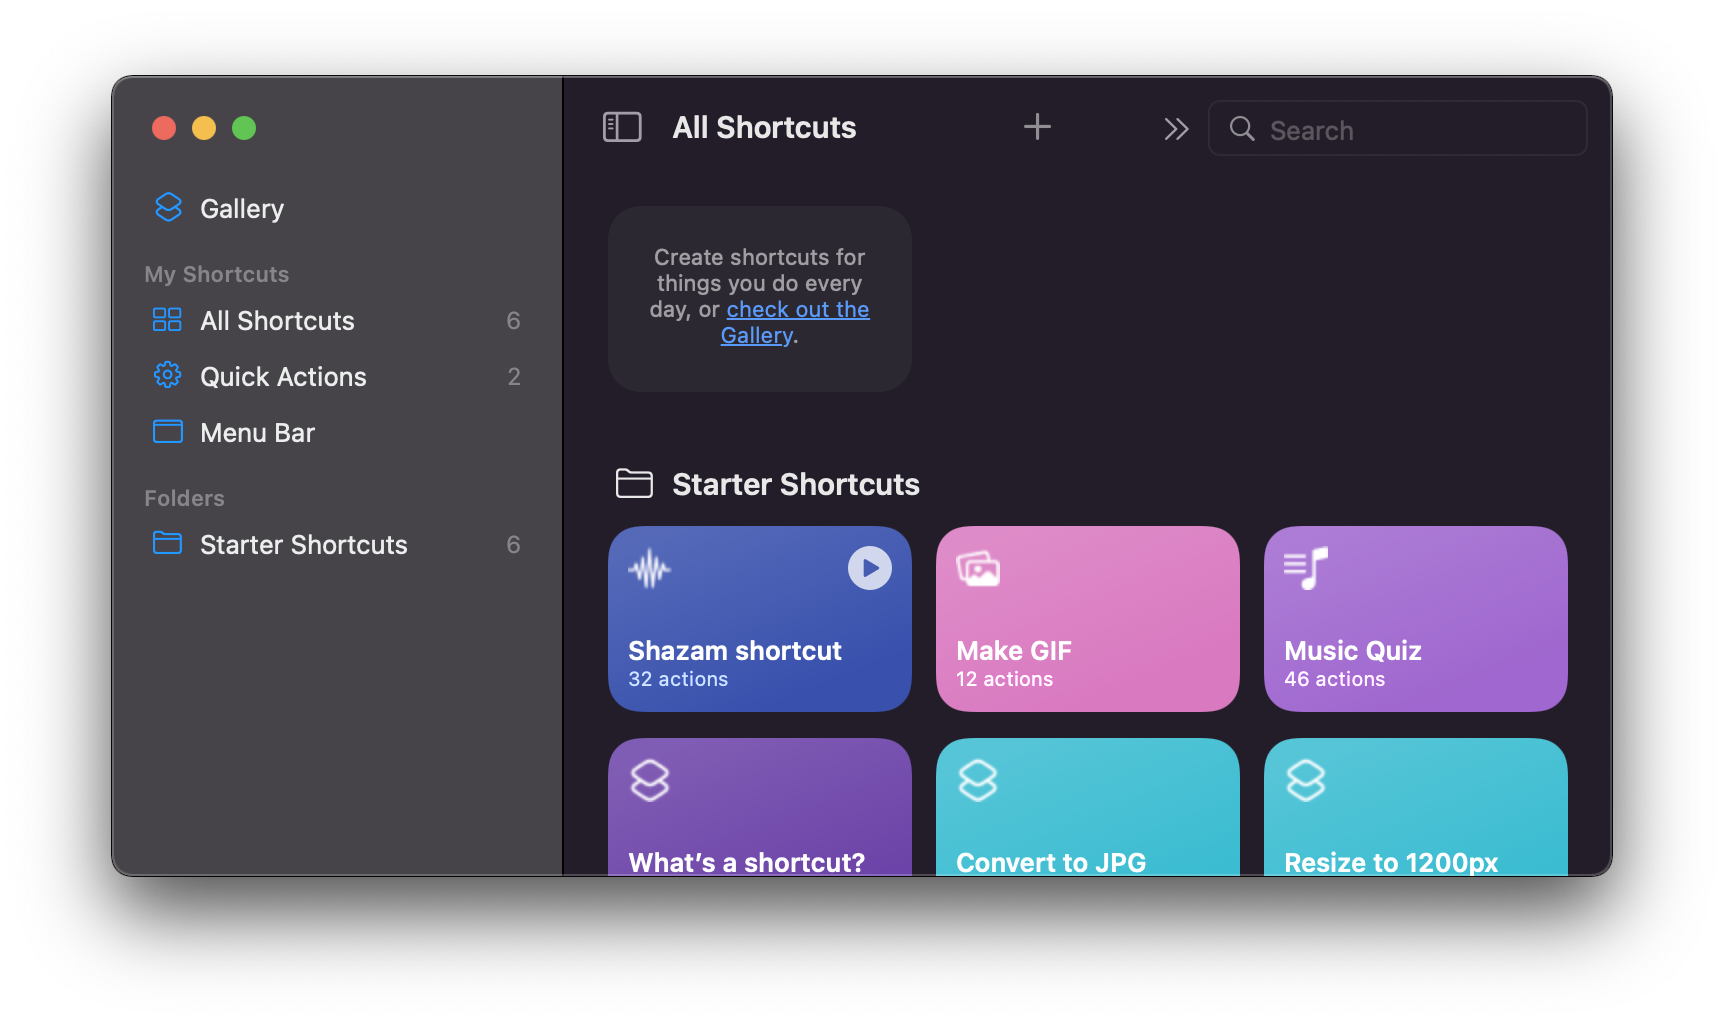
Open Shortcuts:
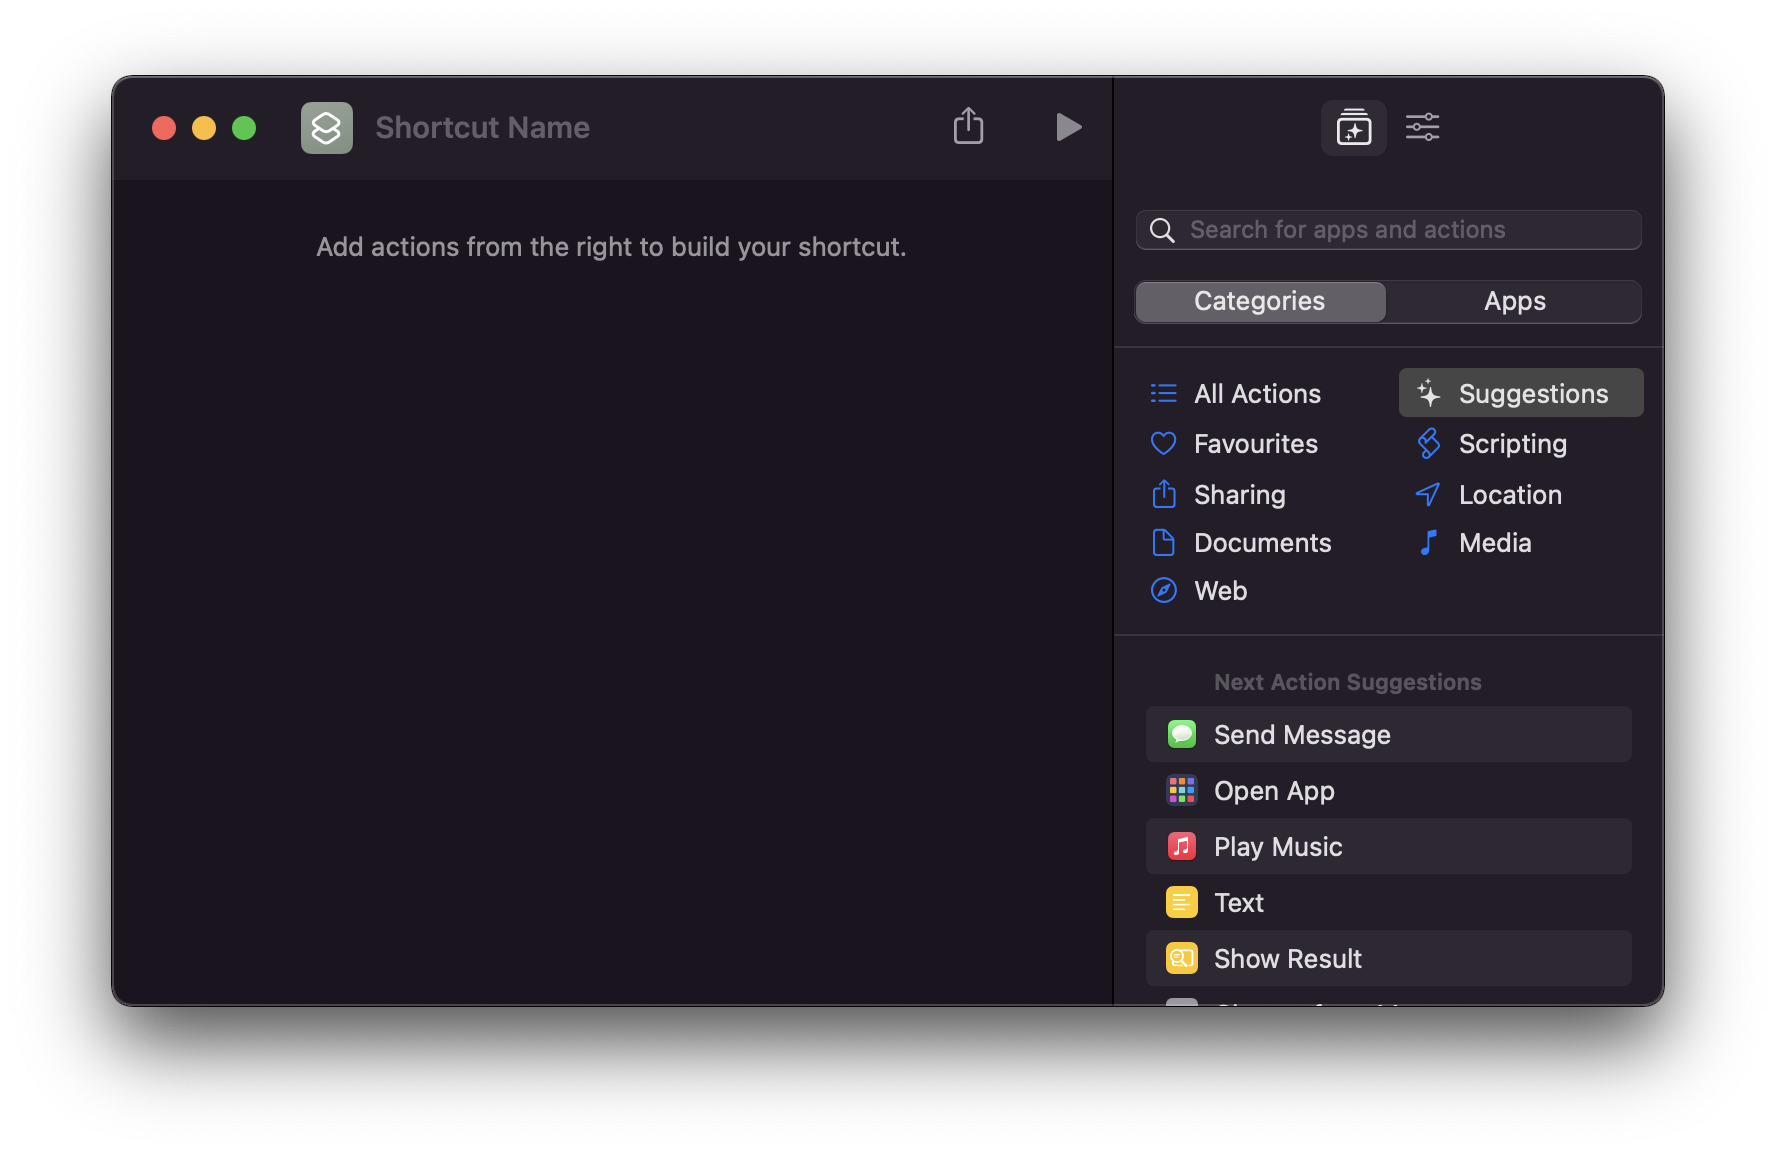
Click the + button, or from the menu select File -> New Shortcut.
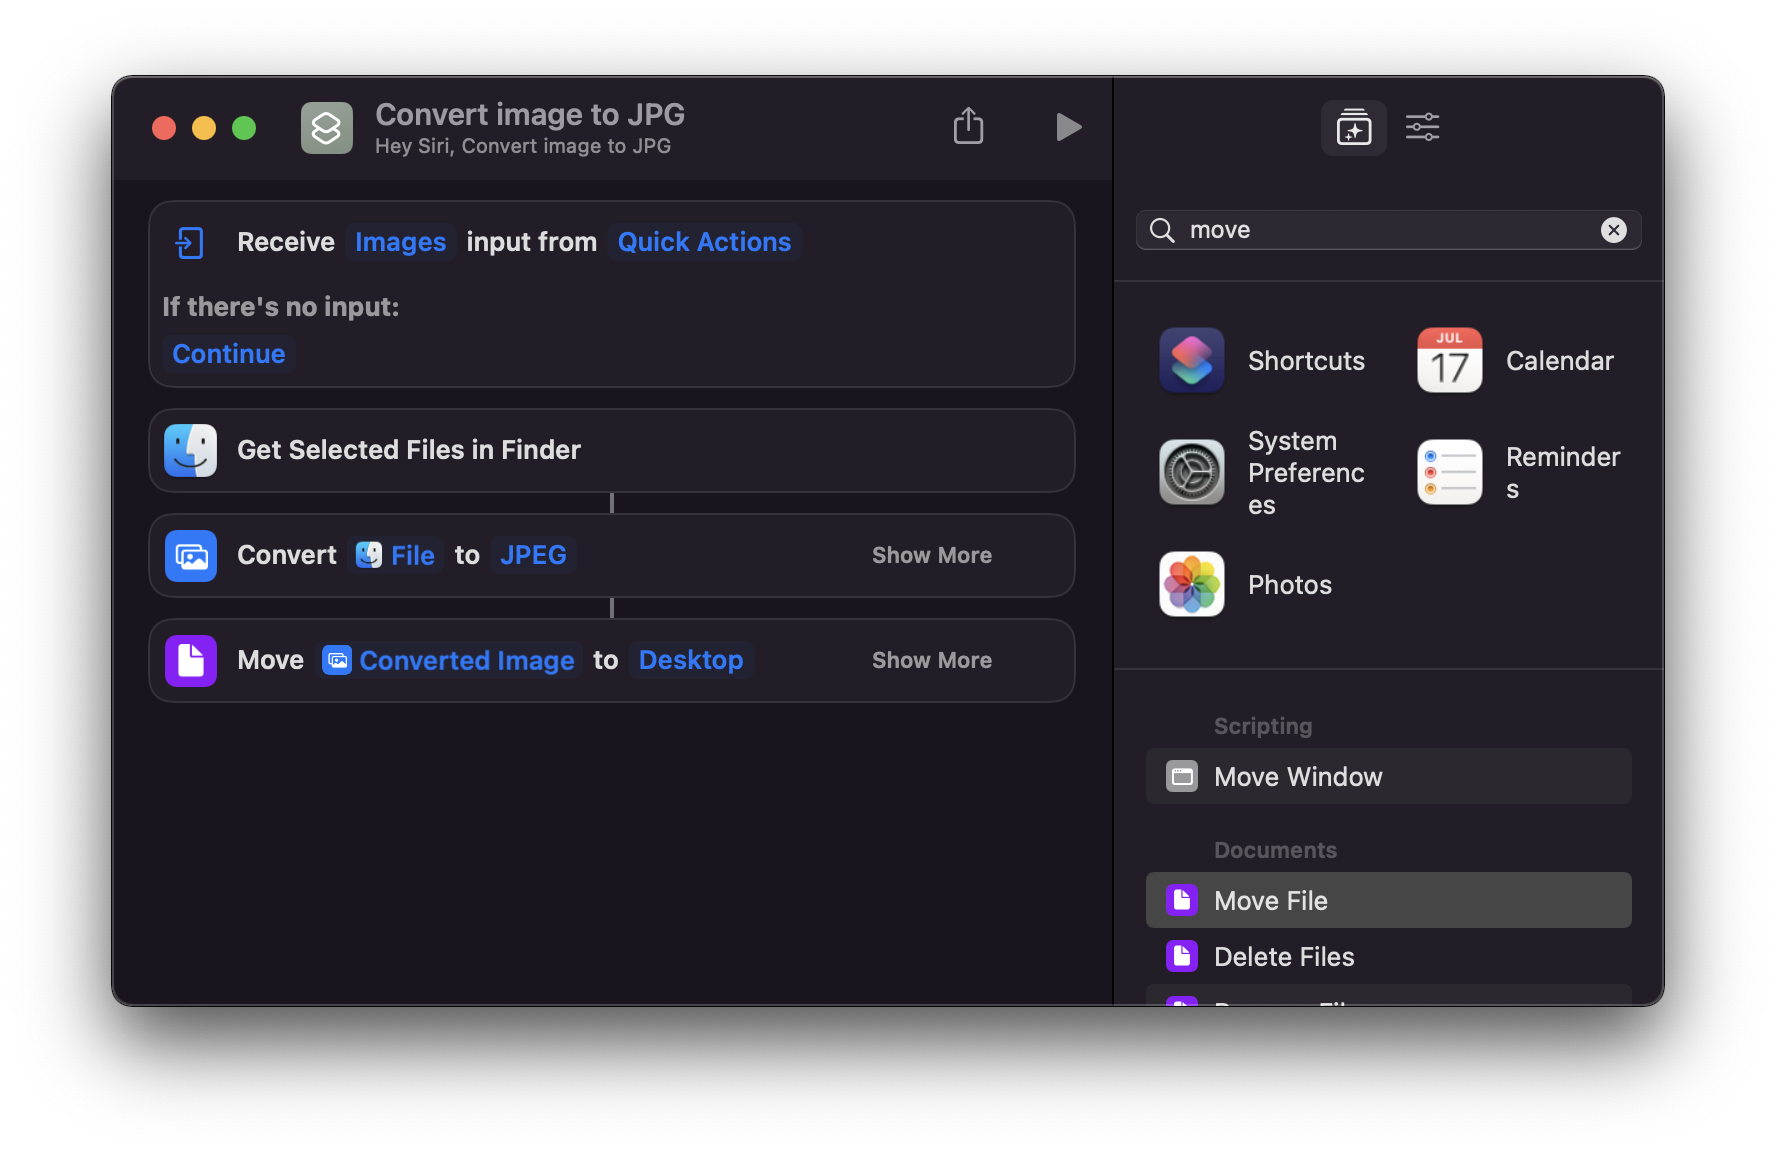
Now on the right you can choose an action. Search “finder” and select the “Get Selected Files in Finder” action:
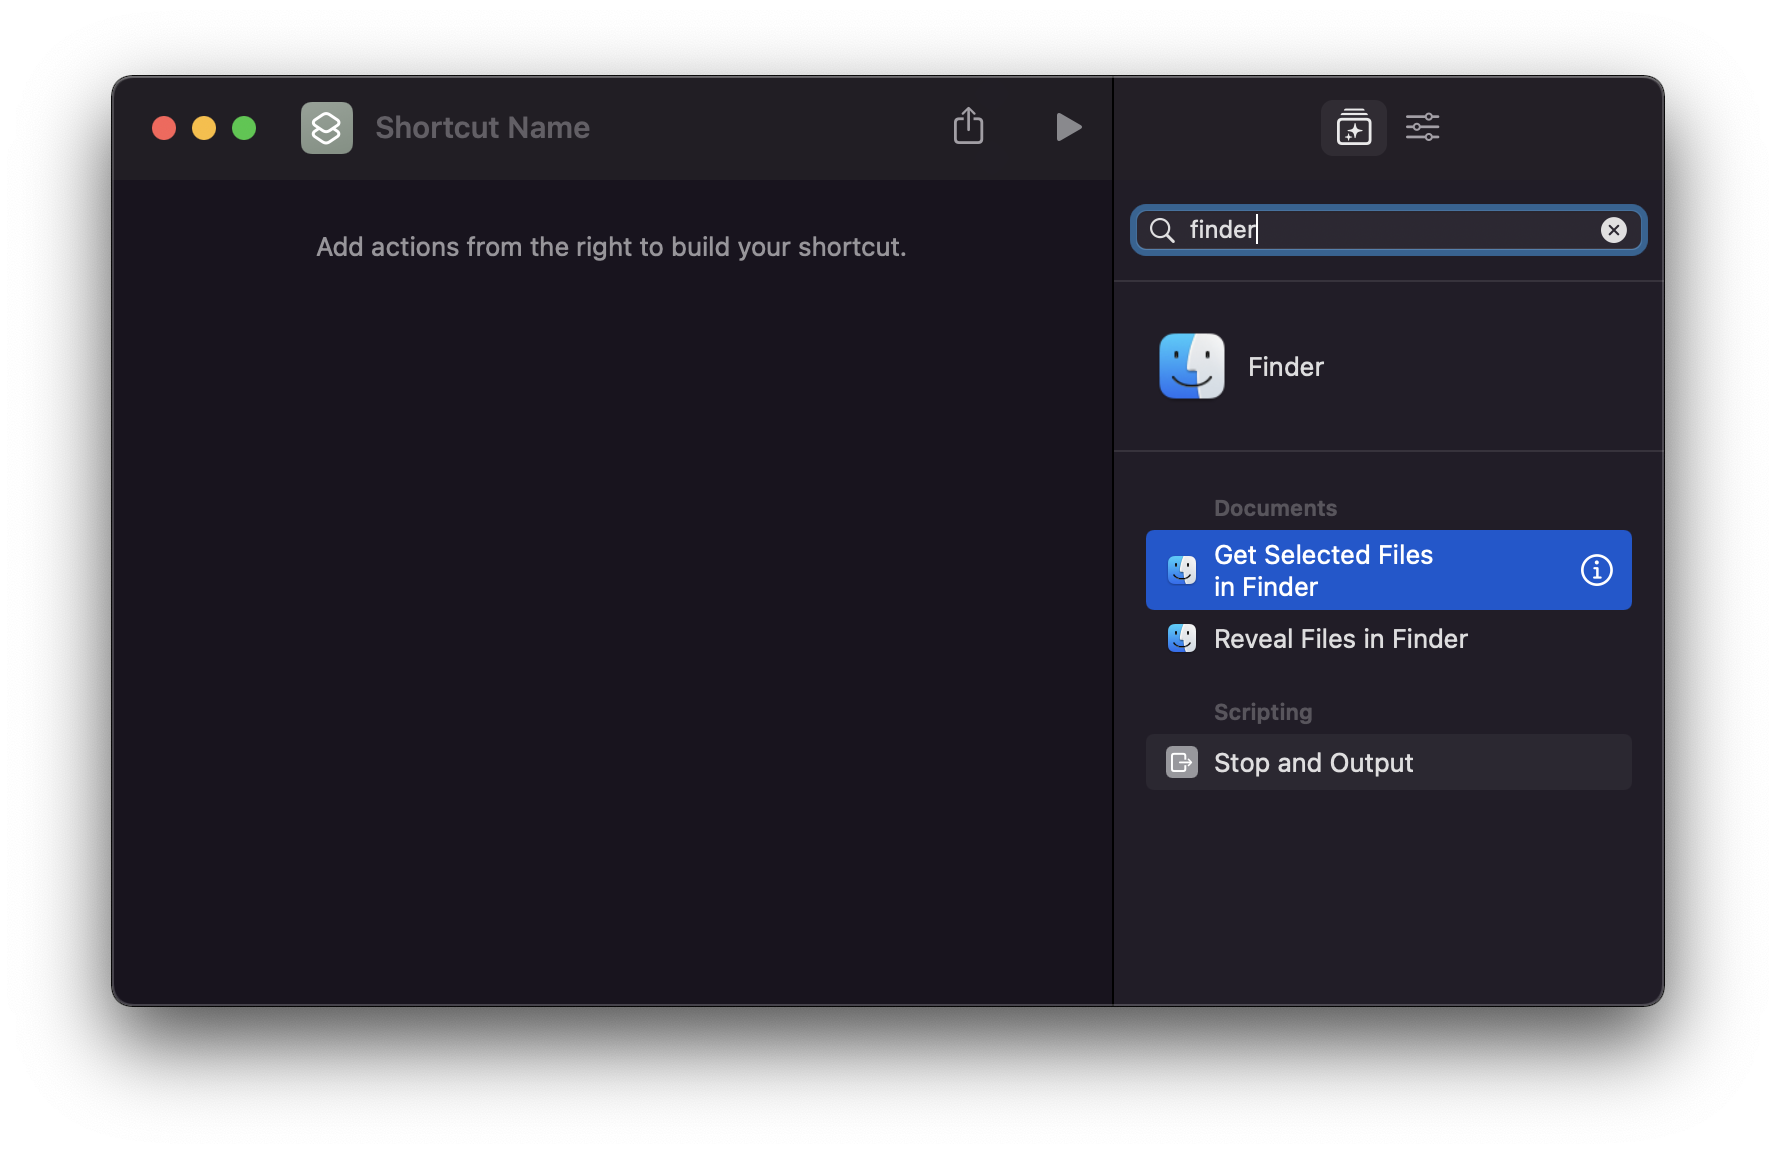
Drag it to the left part of the screen.

Now select “Convert Image”:
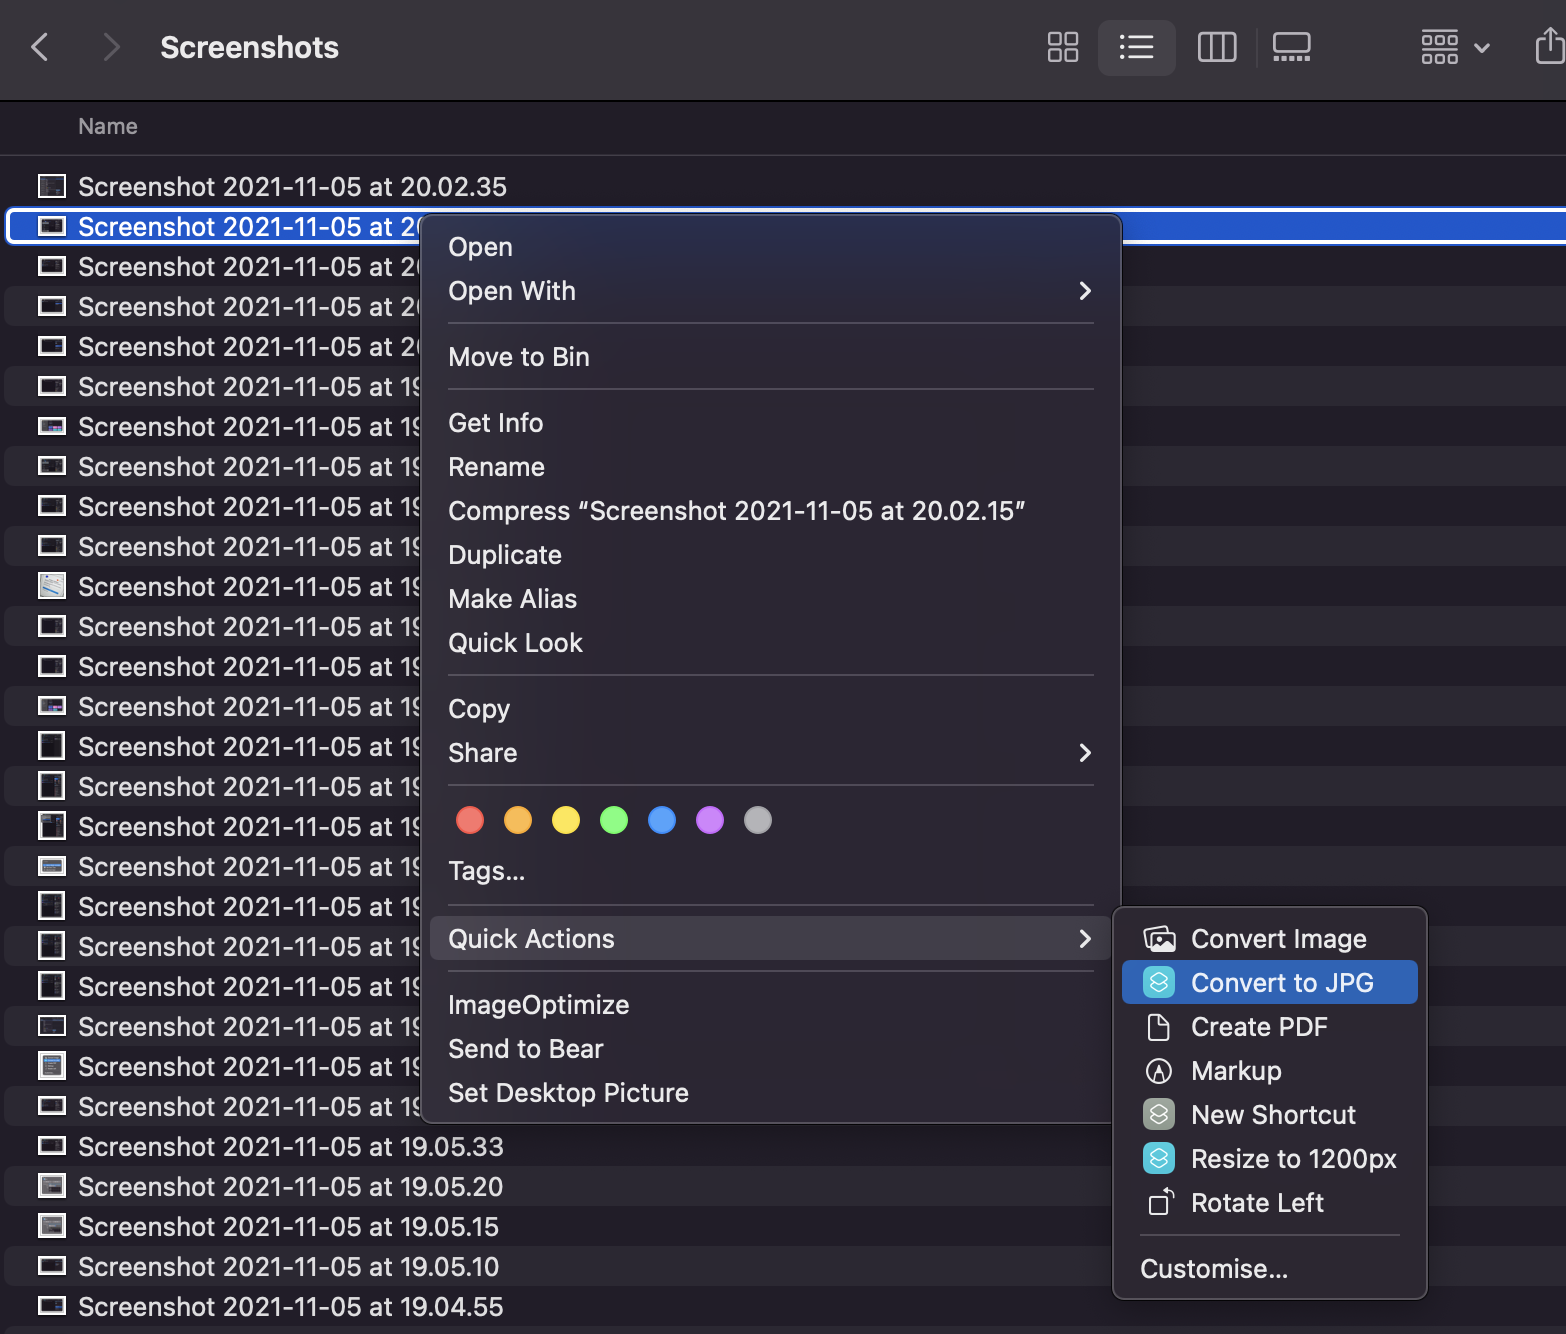
In the settings tab on the right you can choose to use this shortcut as a Quick Action in the Finder, so you can right-click an image and you’ll see the option to convert it to JPG:

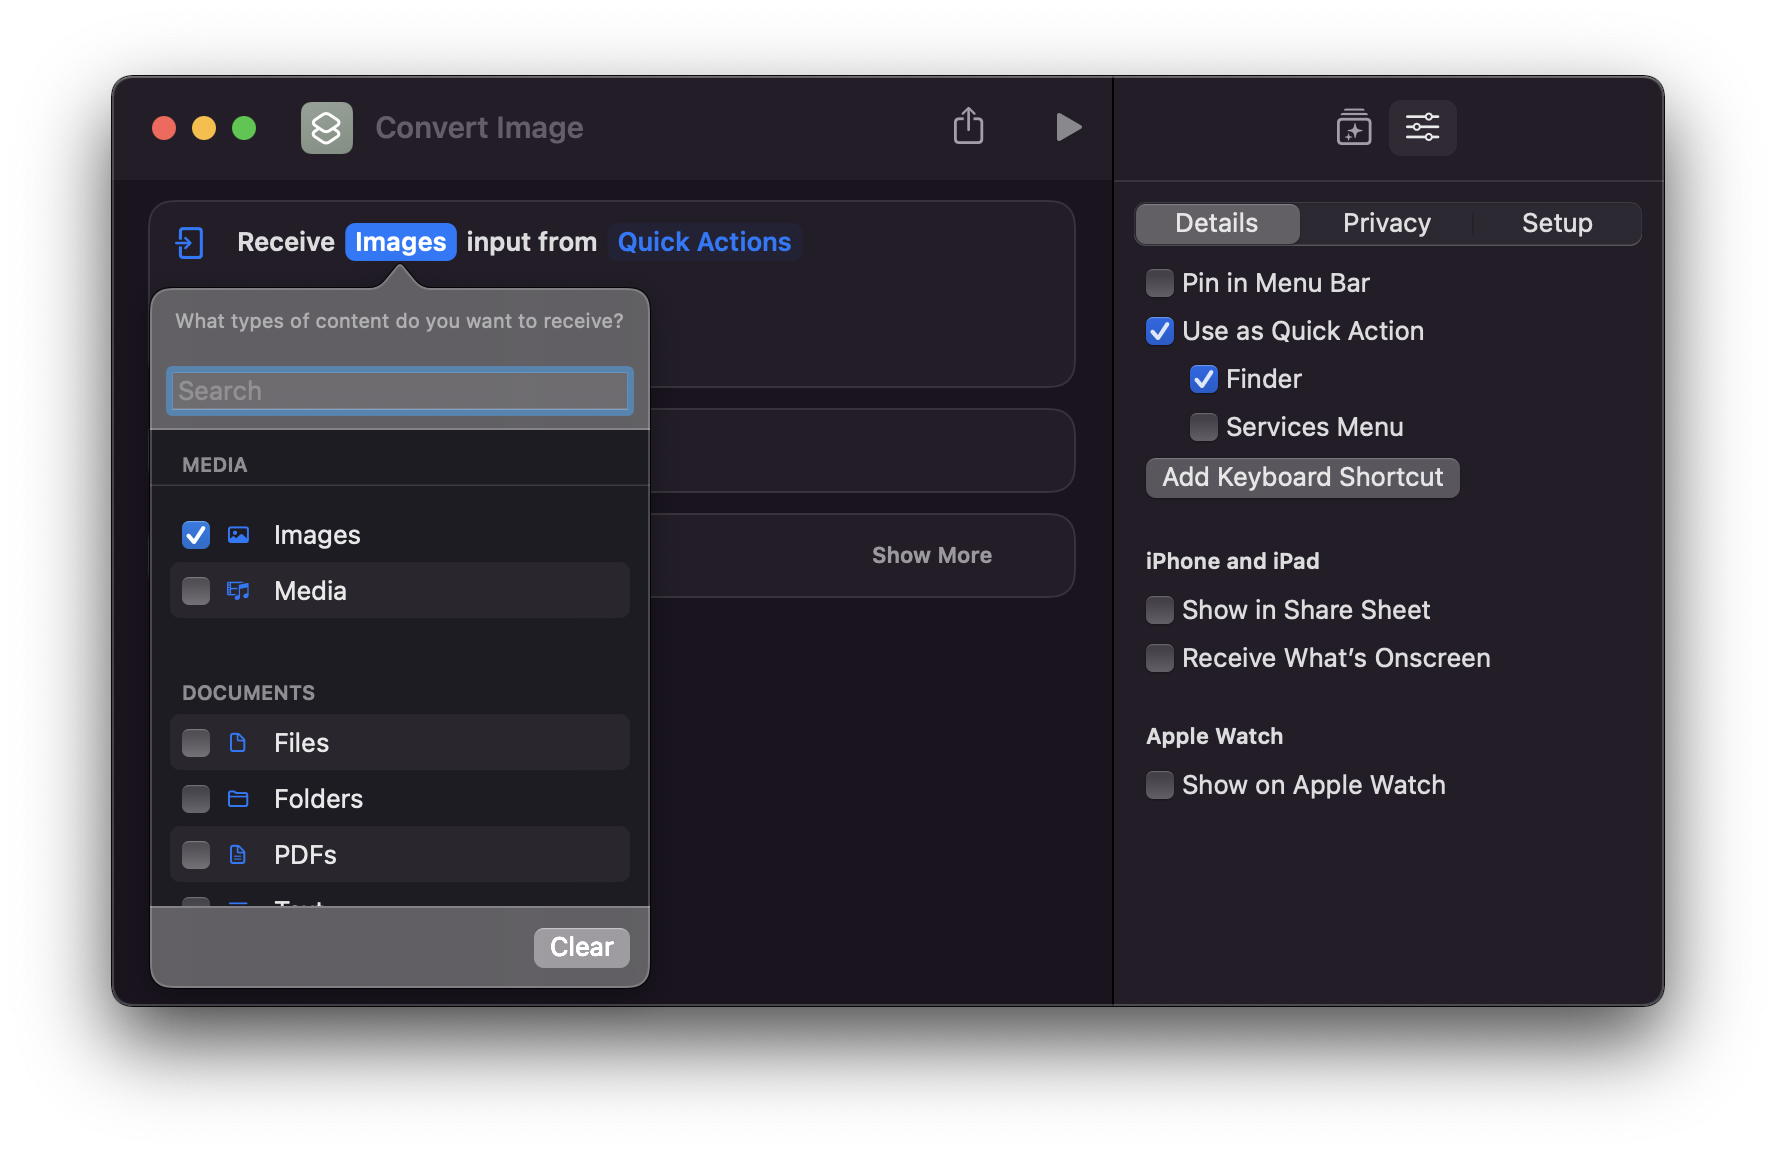
Make sure you just set it to receive images by unselecting all the other file types in the first action:
Finally, add a “Move File” action to save the converted file to the desktop:
Unfortunately I didn’t find a way to save the JPG to the current folder and replace the file selected. I imagine that by spending a little bit more time I can fix this, if you know how to do that, ping me @flaviocopes on Twitter 🙃 but it’s not a big deal, I can live with this. And if I find it too cumbersome, I can always re-do the workflow in Automator. But at least I now know how to use Shortcuts.
Here’s the shortcut to resize the image to 1200px: