Join the AI Workshop and learn to build real-world apps with AI. A hands-on, practical program to level up your skills.
When you try to reach a host on the Internet, you go through your home router, then you reach your ISP network, which in turn goes through its own upstream network router, and so on, until you finally reach the host.
Have you ever wanted to know what are the steps that your packets go through to do that?
The traceroute command is made for this.
You invoke
traceroute <host>and it will (slowly) gather all the information while the packet travels.
In this example I tried reaching for my blog with traceroute flaviocopes.com:
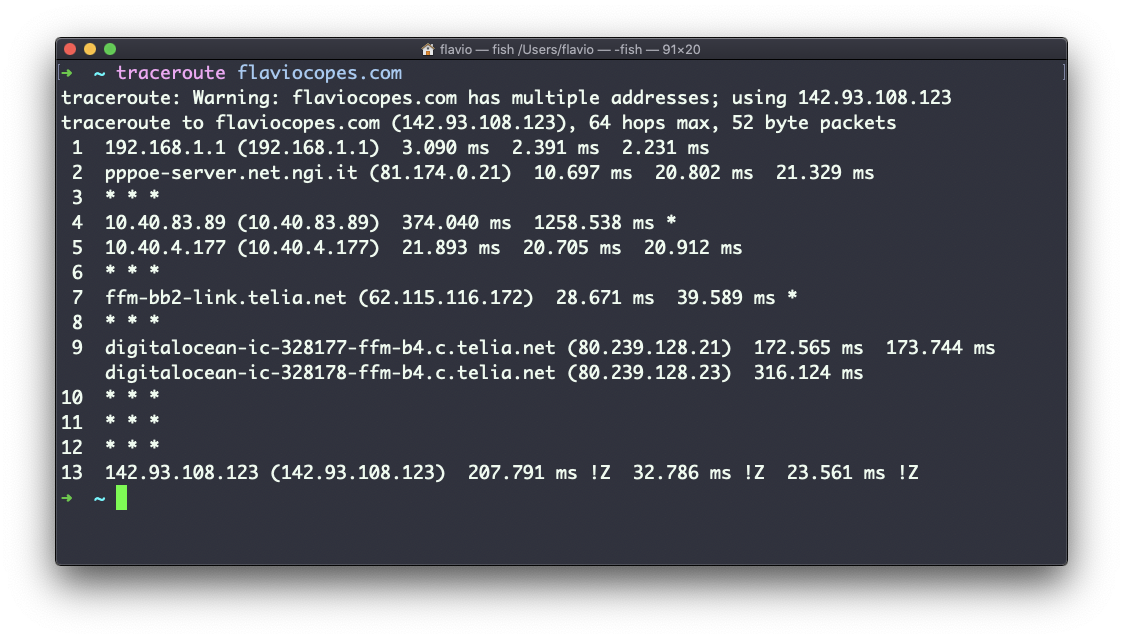
Not every router along the path returns information. In this case, traceroute prints * * *. Otherwise, we can see the hostname, the IP address, and some performance indicator.
For every router we can see 3 samples, which means traceroute tries by default 3 times to get you a good indication of the time needed to reach it. This is why it takes this long to execute traceroute compared to simply doing a ping to that host.
You can customize this number with the -q option:
traceroute -q 1 flaviocopes.com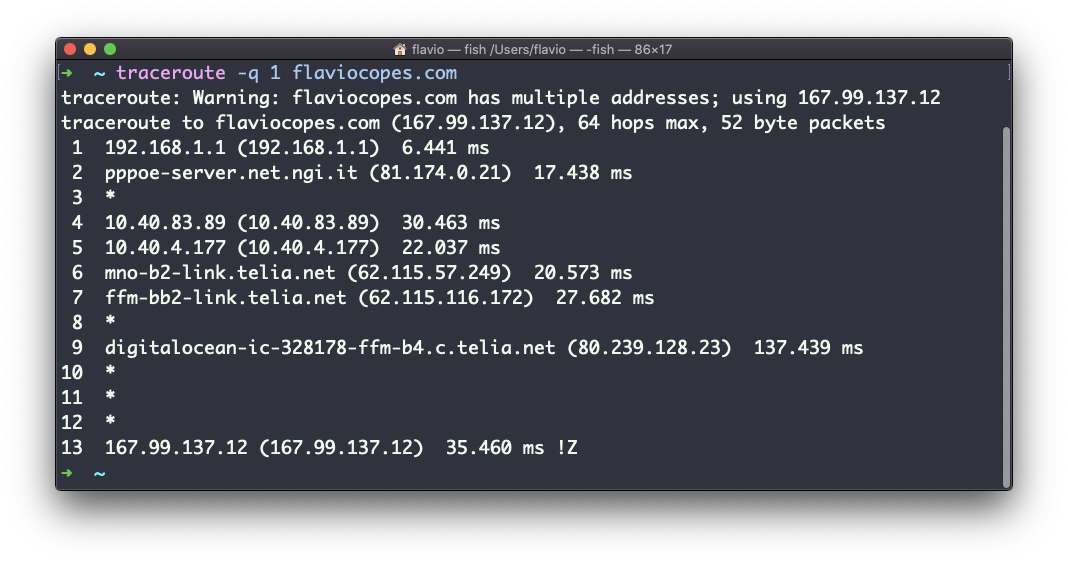
The traceroute command works on Linux, macOS, WSL, and anywhere you have a UNIX environment