Join the AI Workshop and learn to build real-world apps with AI. A hands-on, practical program to level up your skills.
In this project we’re going to use a joystick, and we’re going to hook it up to the platform game we created in the lesson “How to create a game with Phaser.js”.
The goal is to move the player in the game using the joystick.

Sounds fun, right?
We’ll do it using Johnny Five. In our Node.js app, we’ll connect to the device, and we’ll create a Websockets server. Before starting, I highly recommend you to read the Johnny Five Tutorial.
The browser client will connect to this Websockets server and we’ll stream the left/right/still/up events to handle the player movements.
Let’s go!
The Joystick
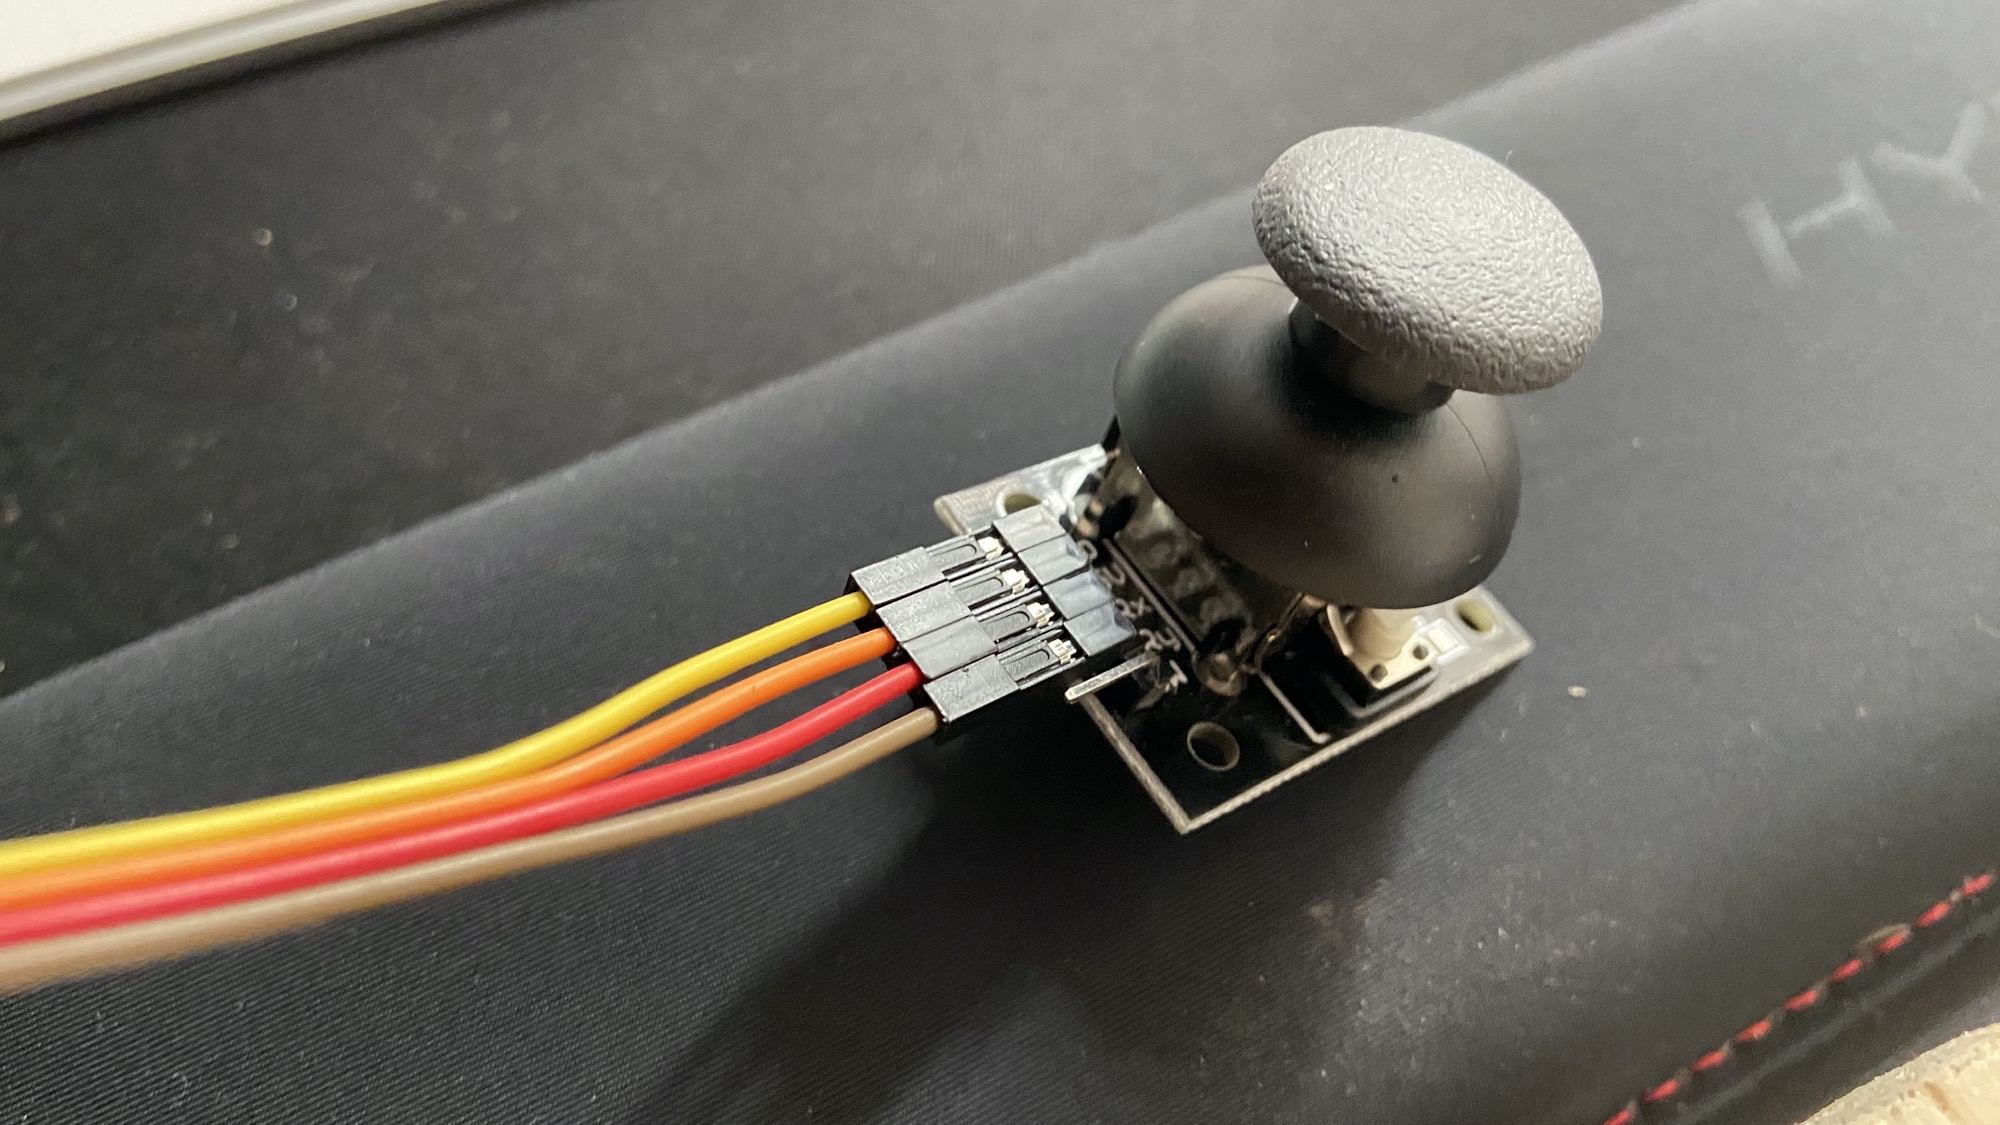
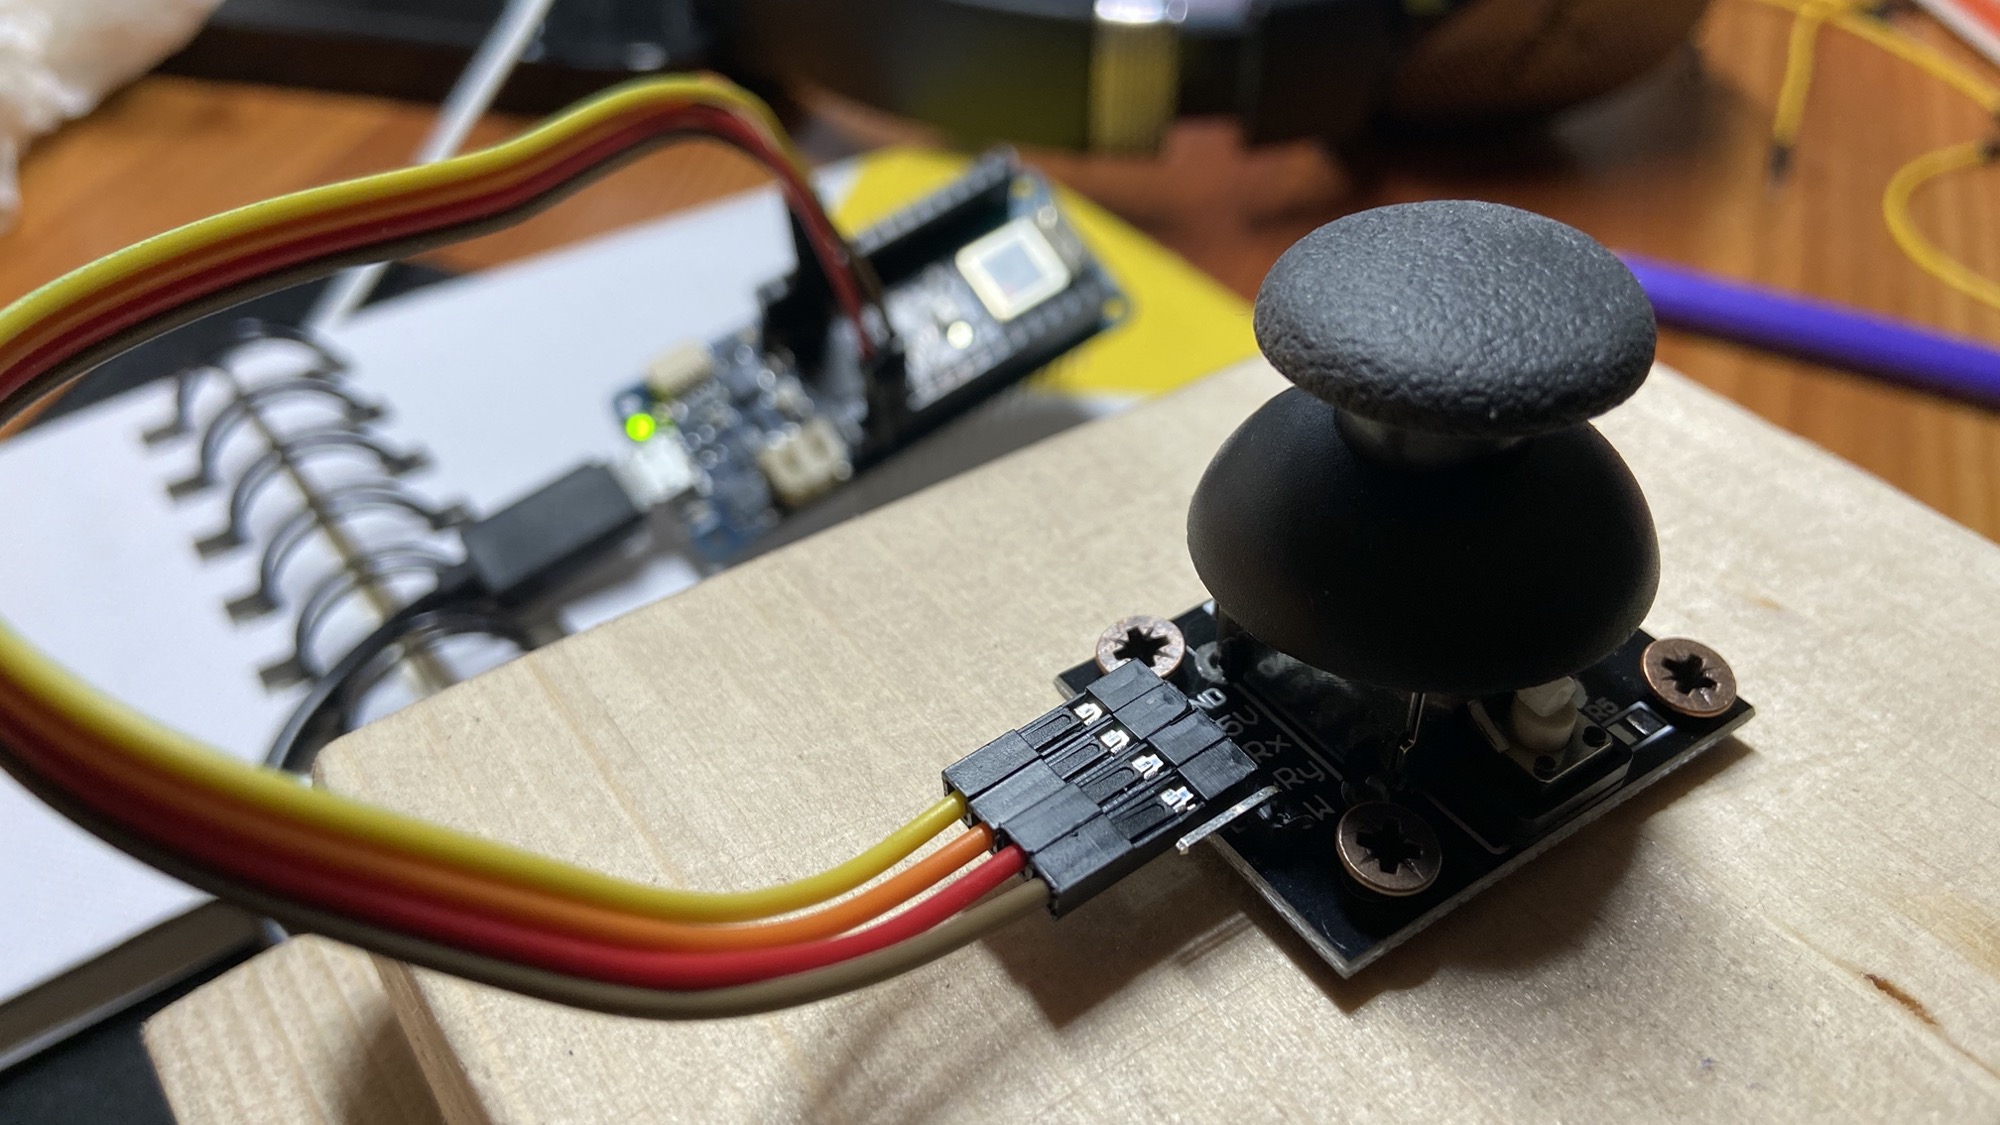
This is the Joystick component we’re going to use in this project.
It’s just like the ones you can find on real-world device, like a Playstation controller:
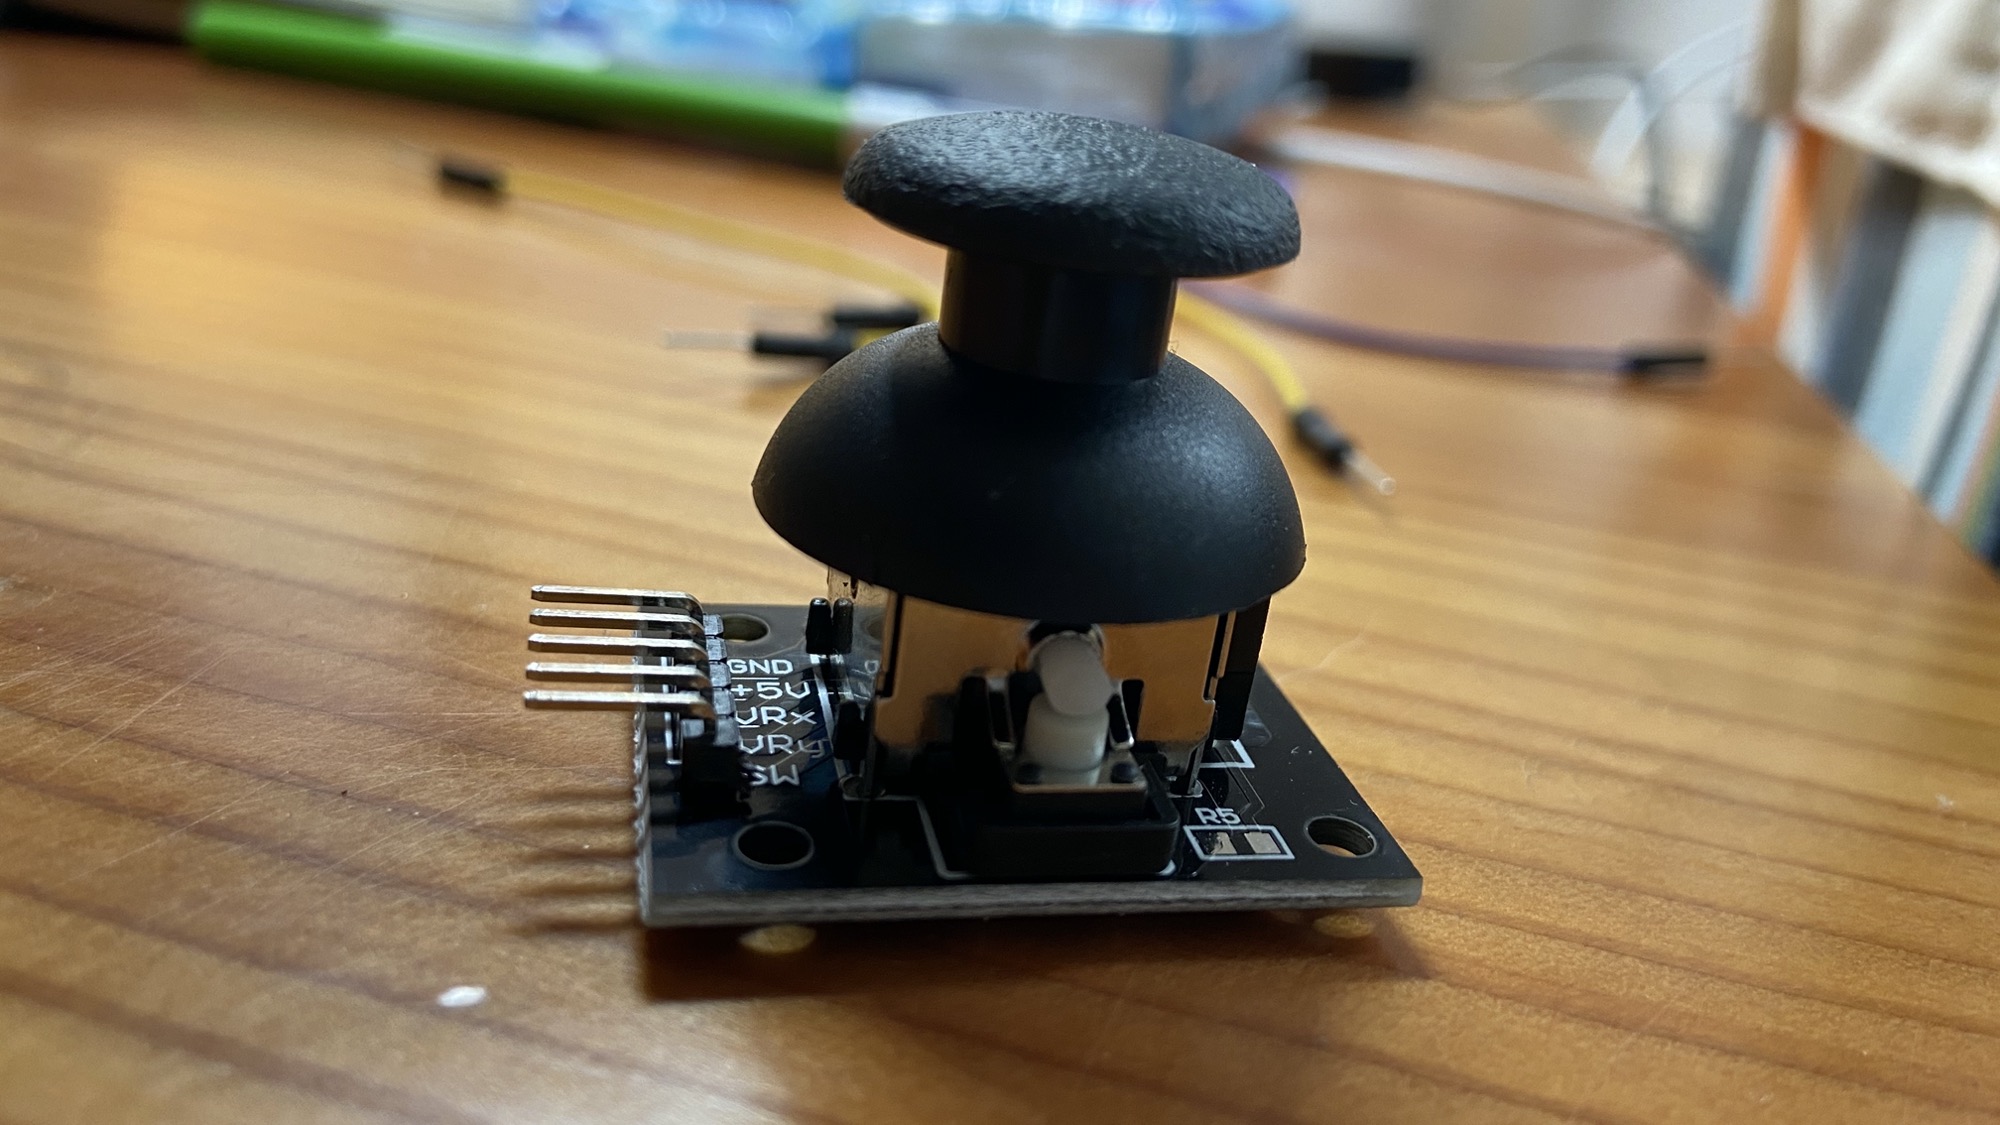
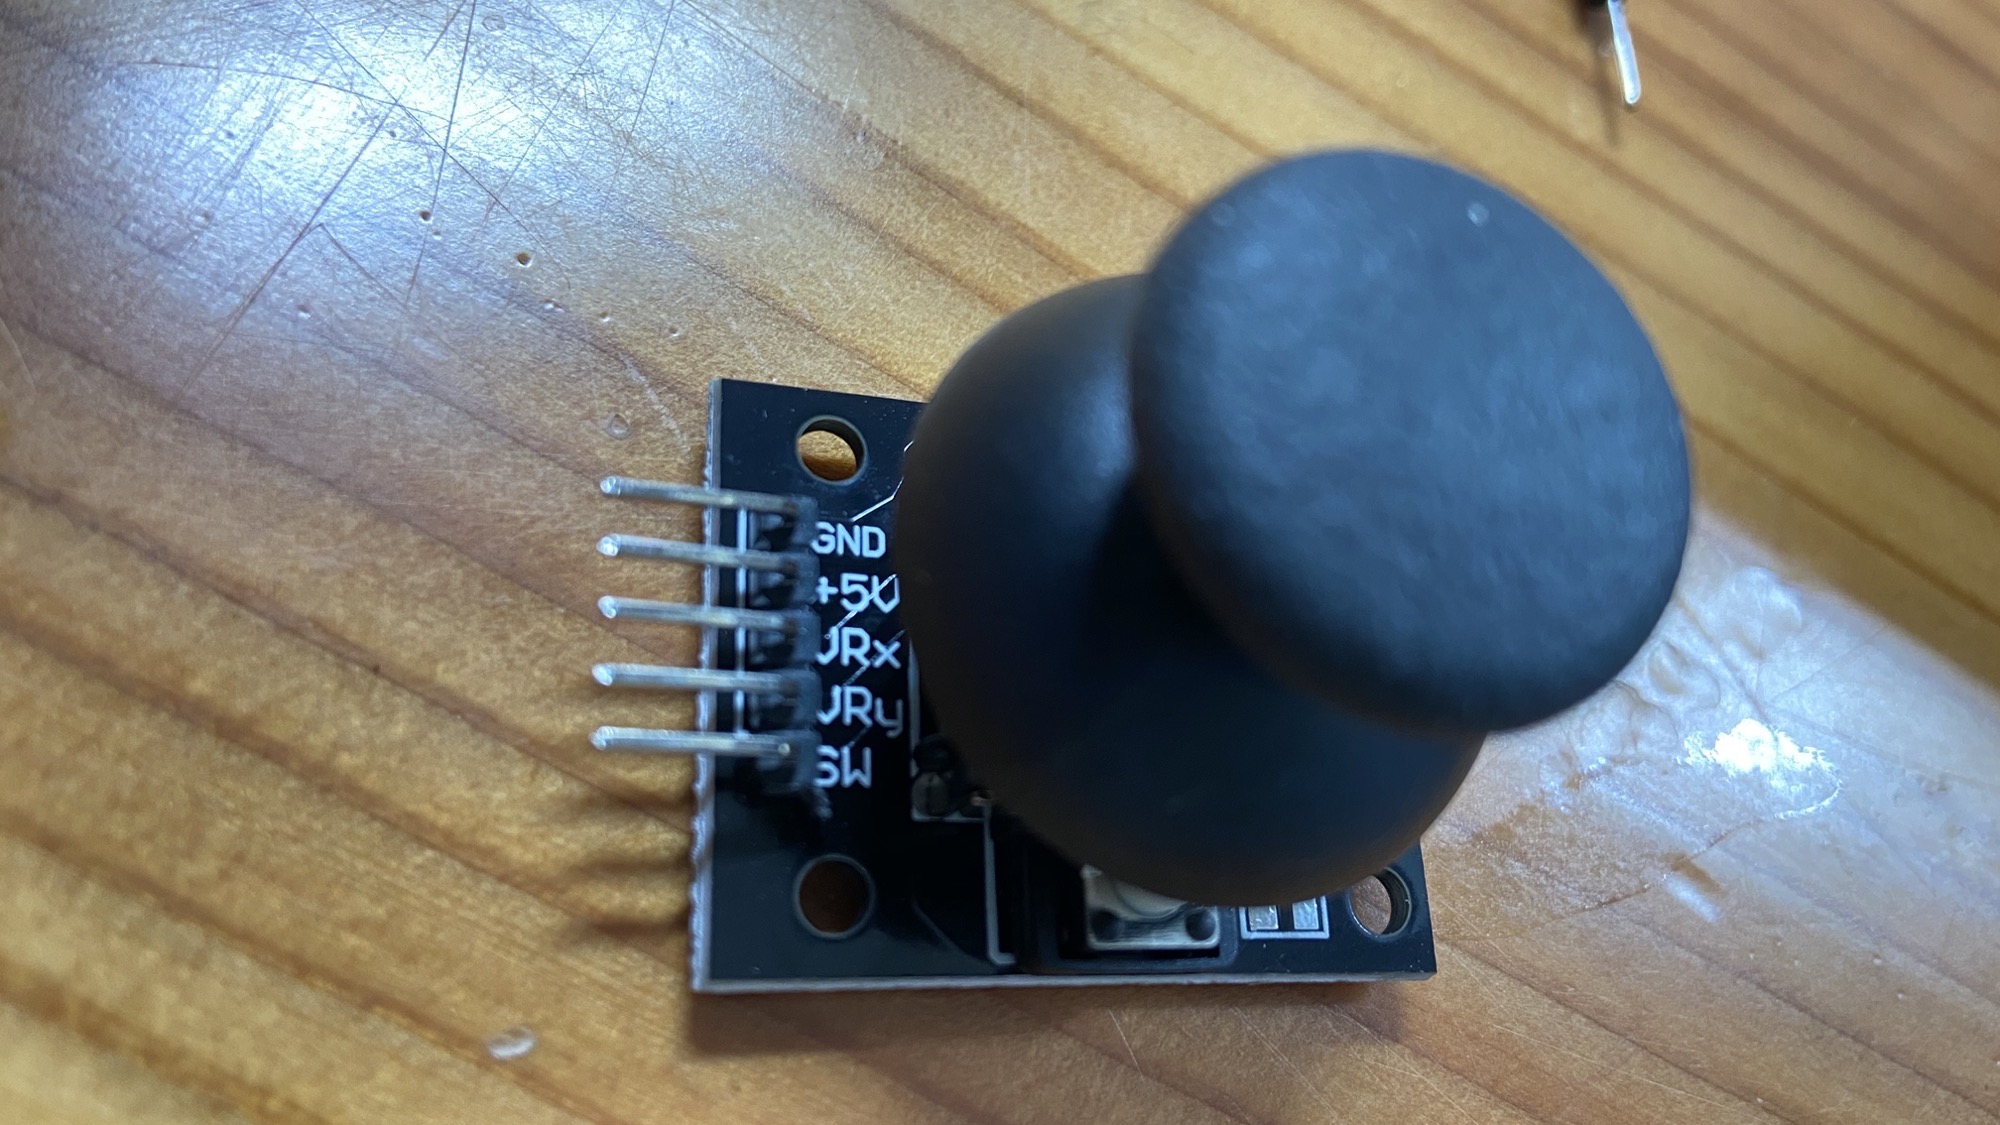
It has 5 pins: GND, +5V (VCC), X, Y, and SW.
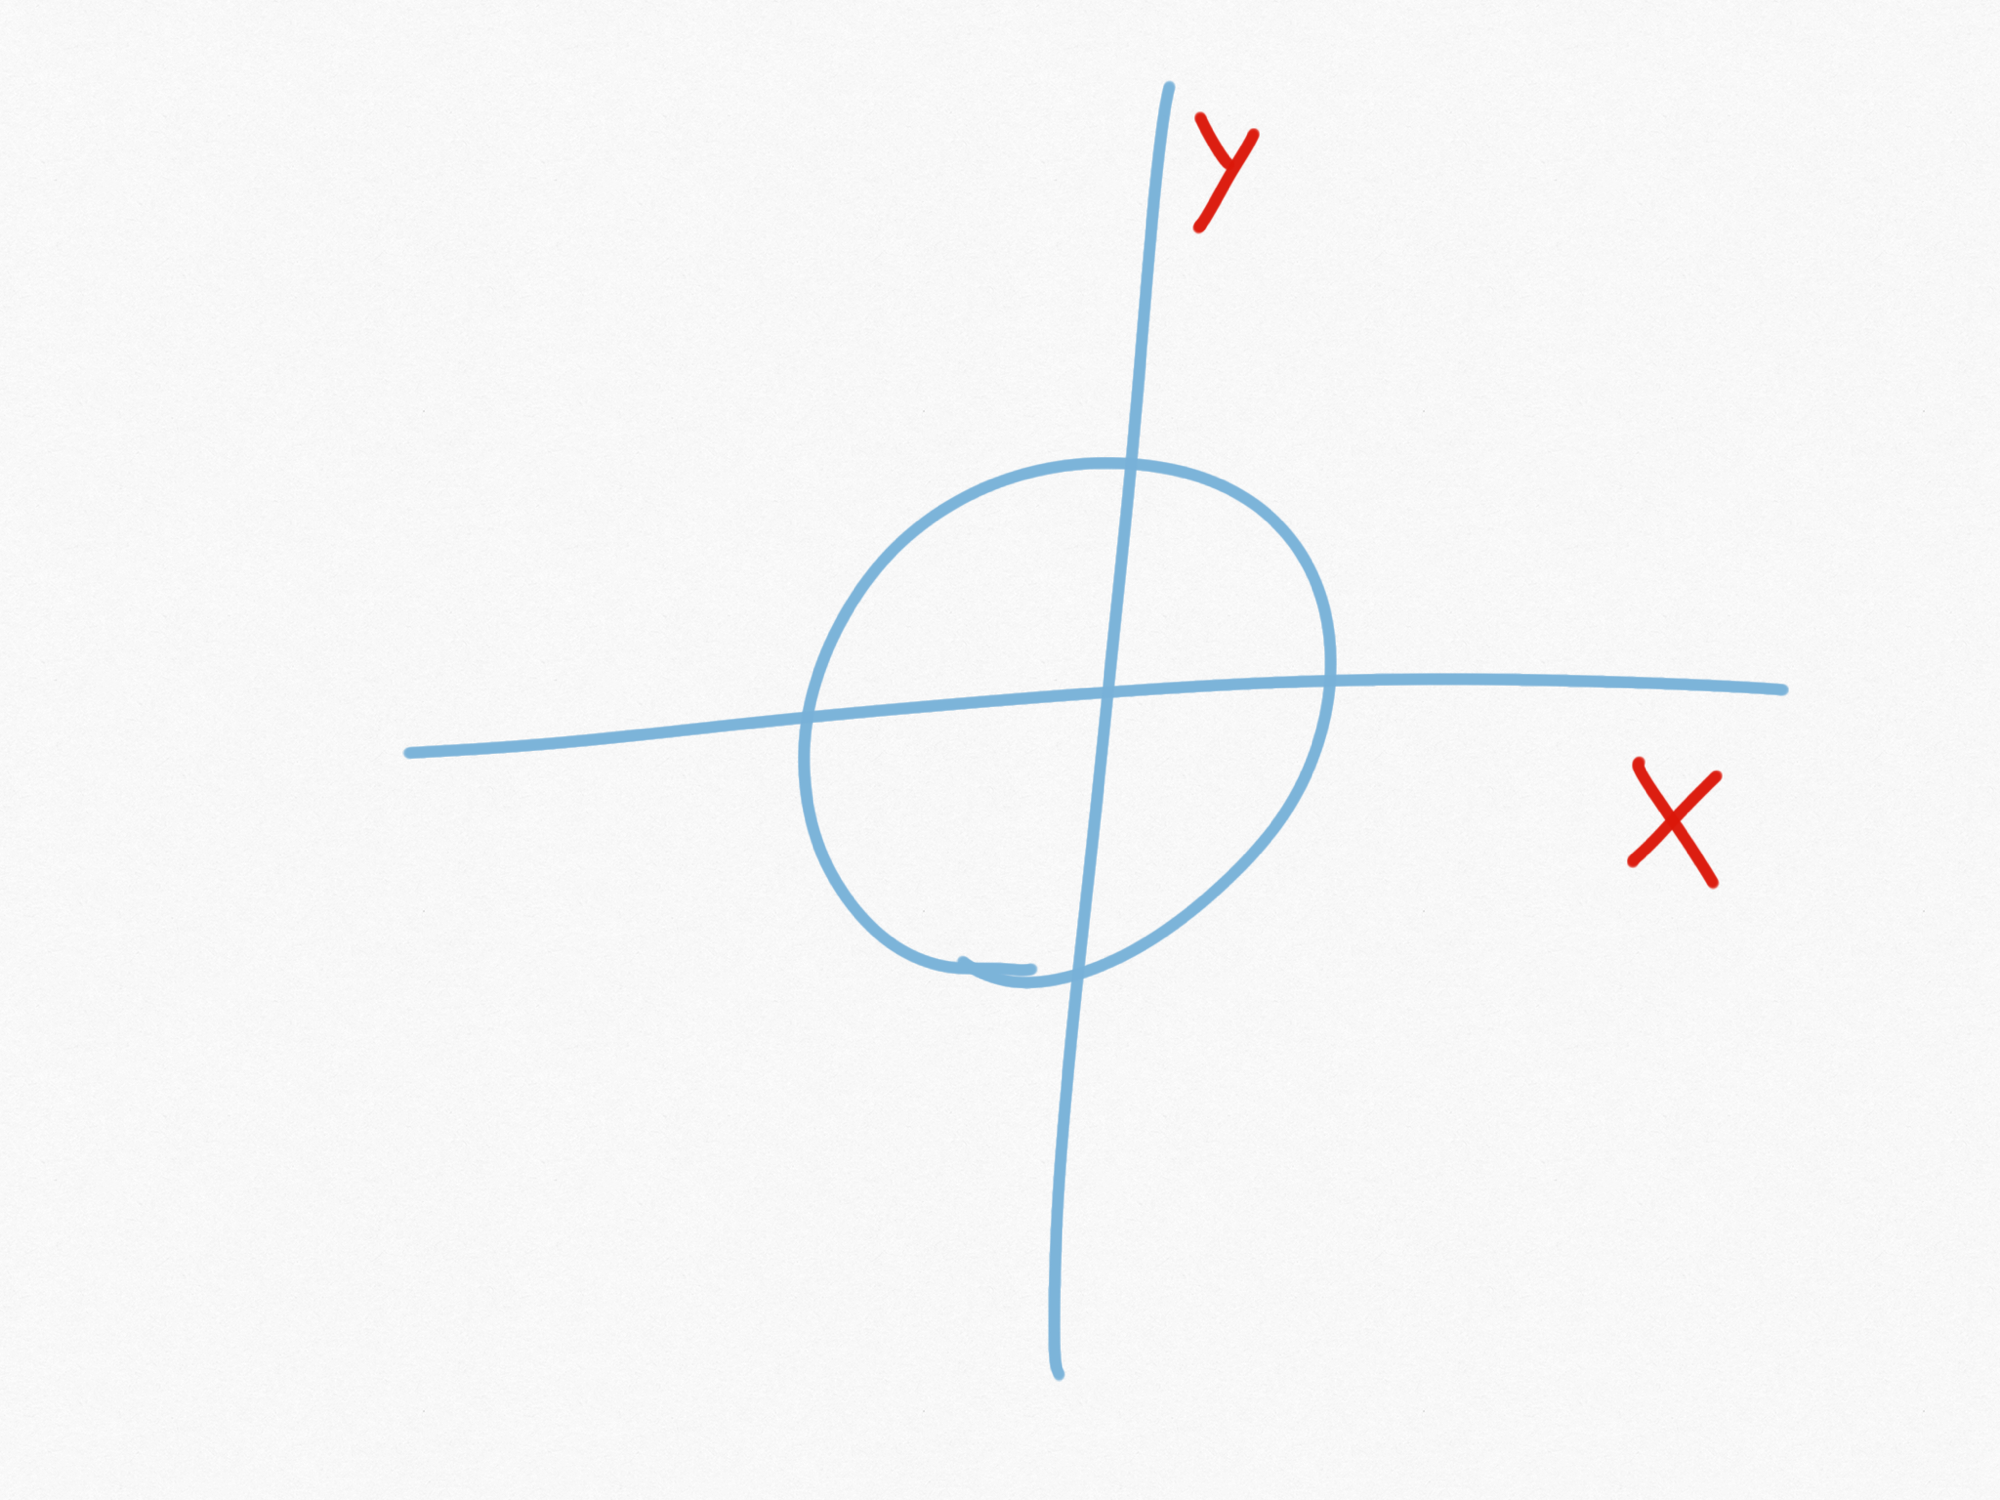
X and Y are the coordinates of the joystick.
X is an analog output, and signals the movement on the joystick on the X axis.
Y is the same, for the Y axis:
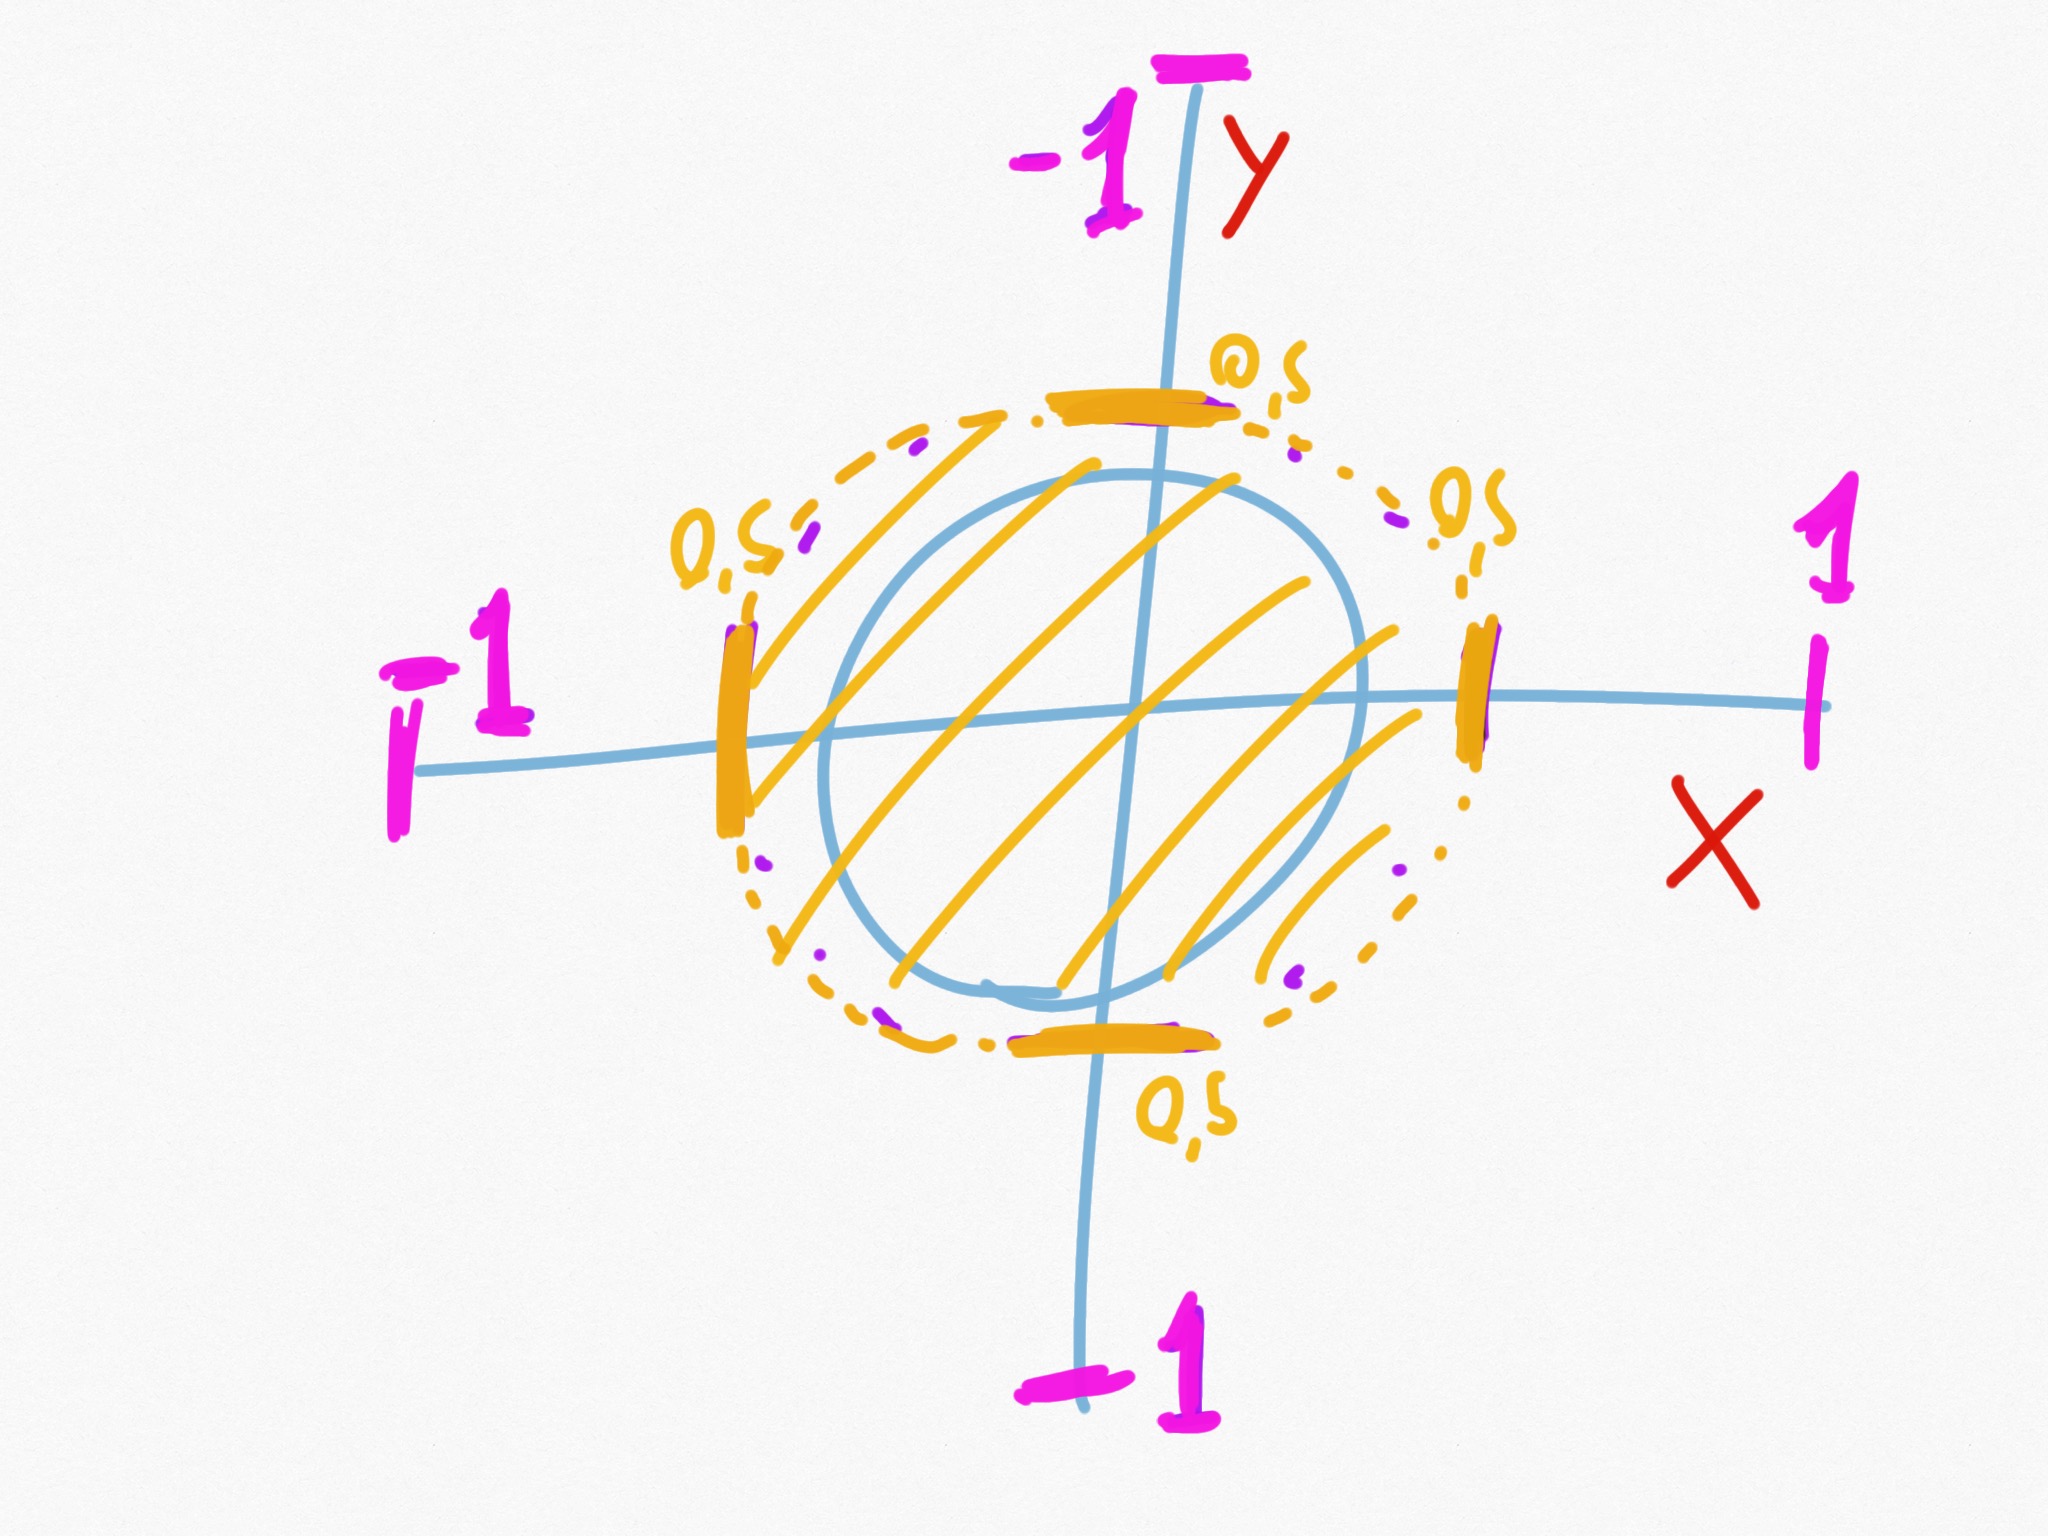
Taking the joystick as it’s pictured above, with the pins on the left, these will be the measures:
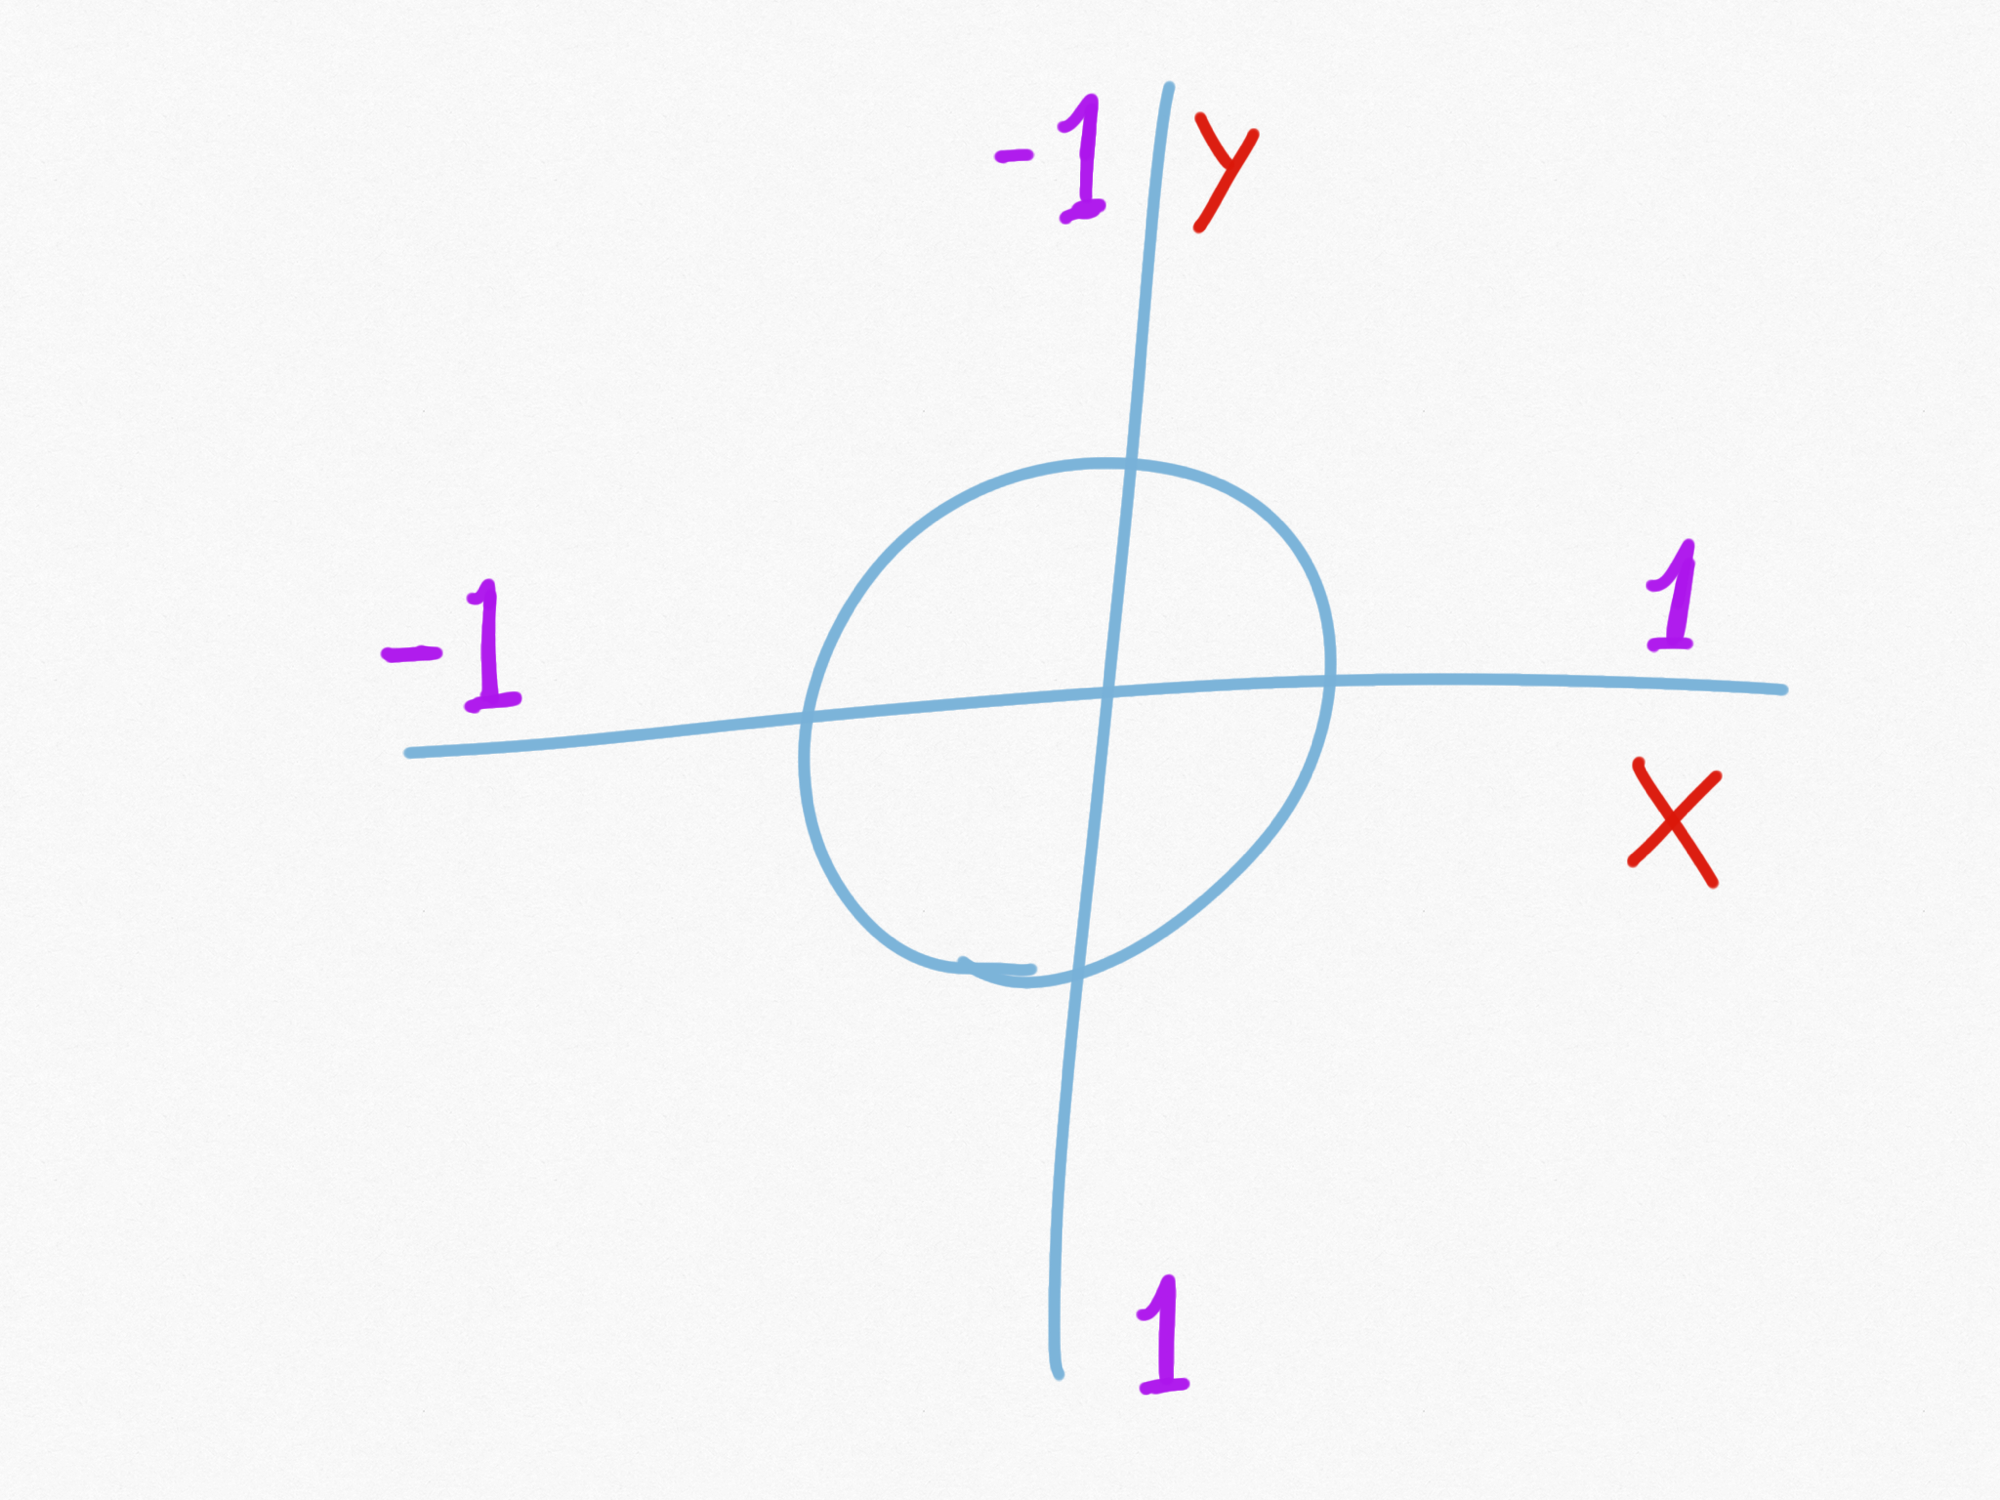
X is -1 when full left and 1 when at full right.
Y is -1 when reaches the top, 1 at the bottom.
The SW pin is a digital output that’s activated when the joystick is pressed (it can be pressed), but we will not use it.
Connect 4 wires to the joystick:
Connect to the Arduino
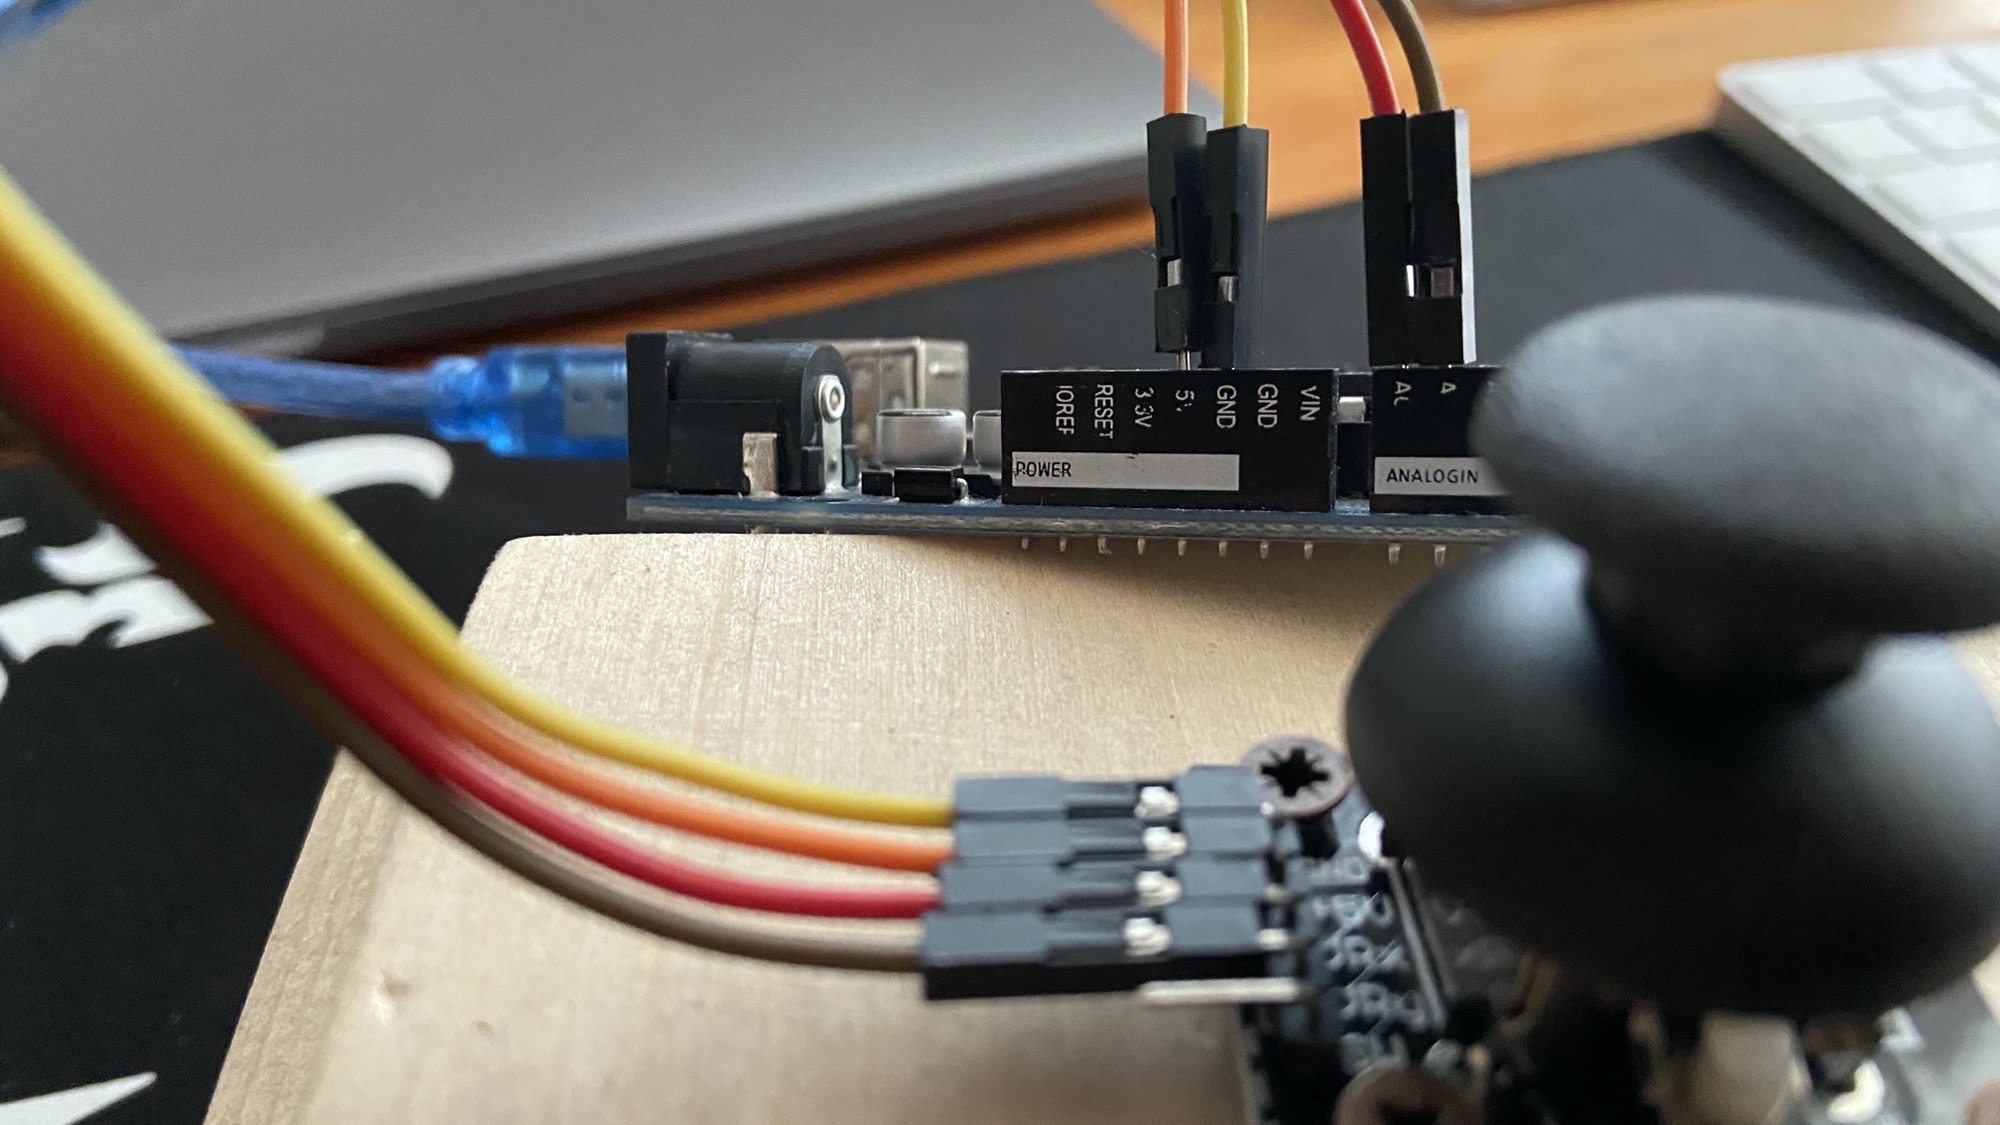
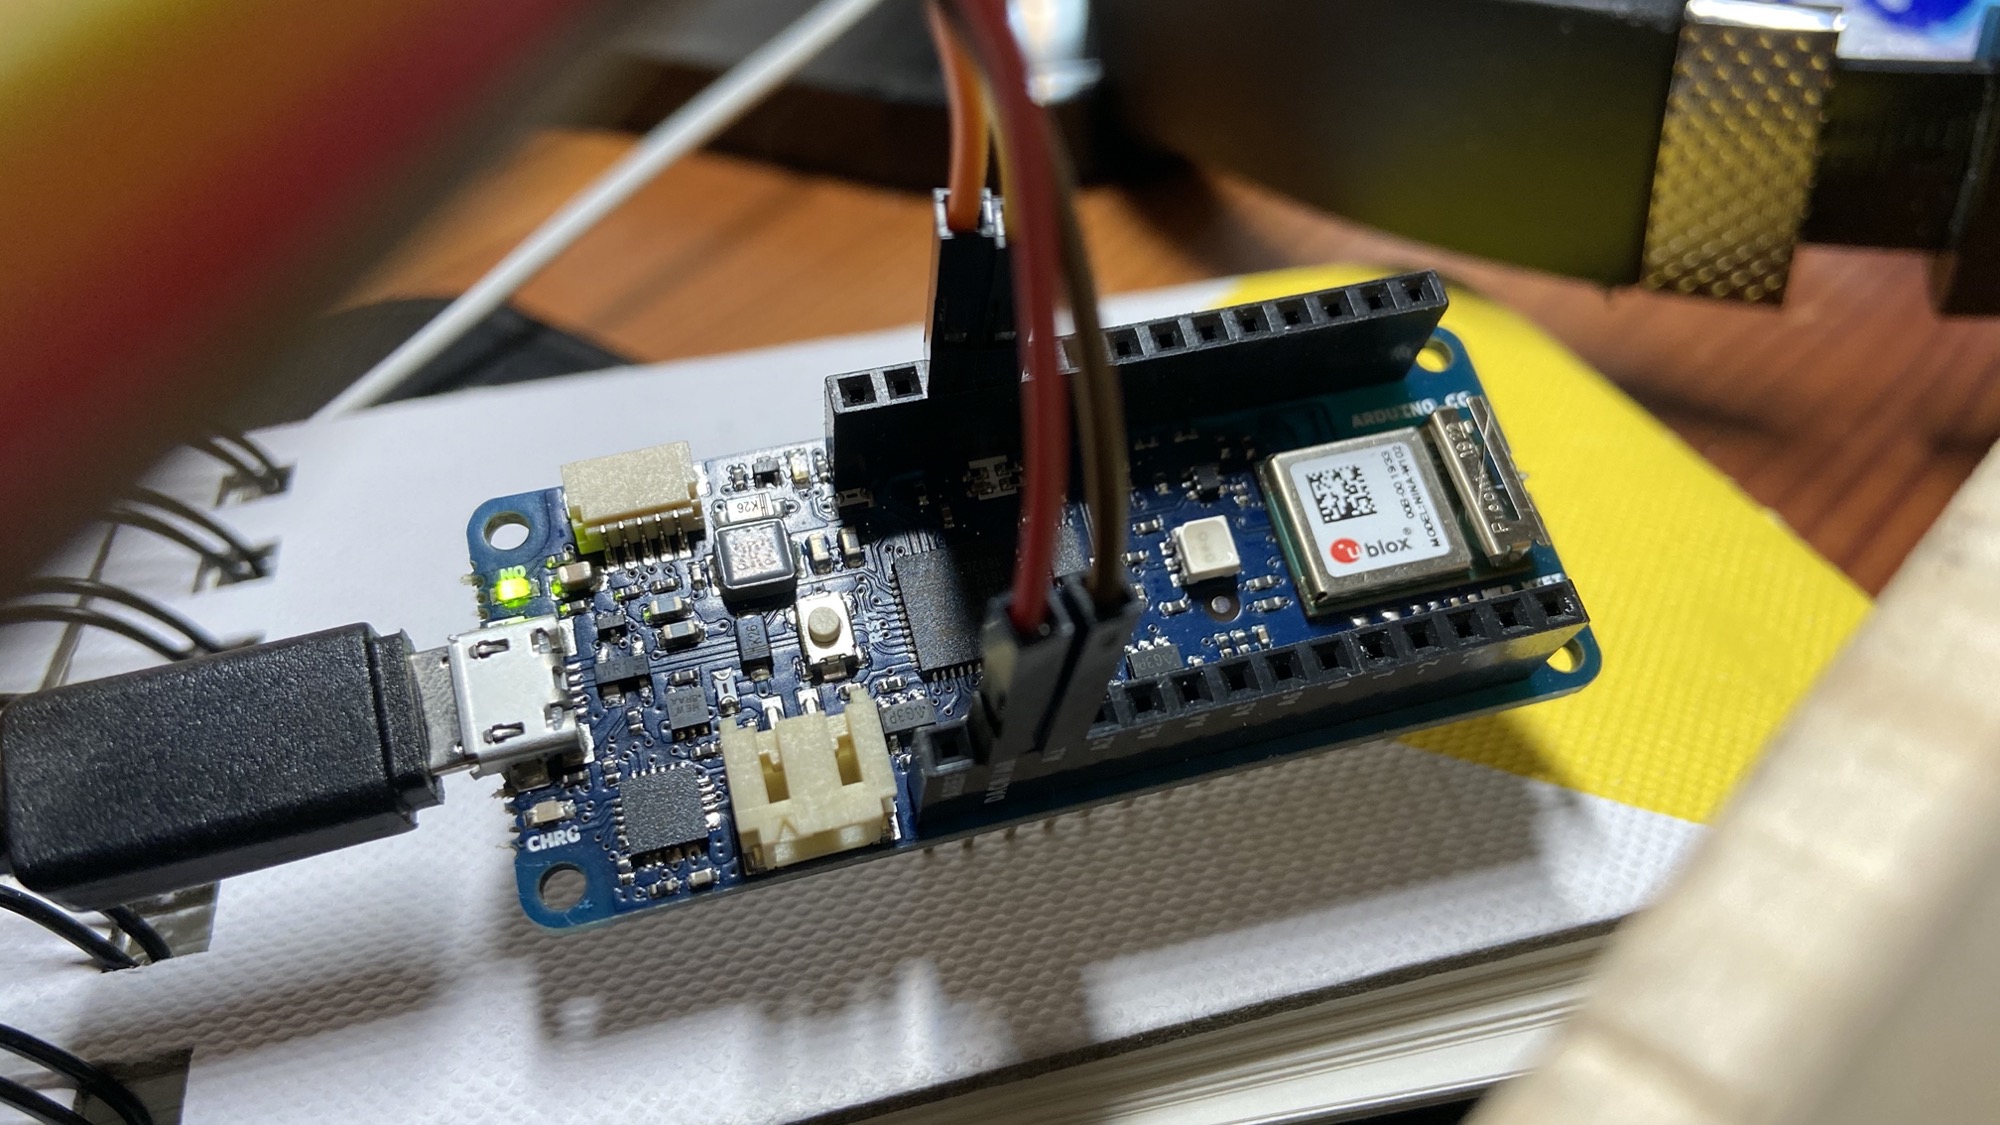
I use an Arduino Uno board clone and I’ll connect pin #1 and #2 to GND and +5V.
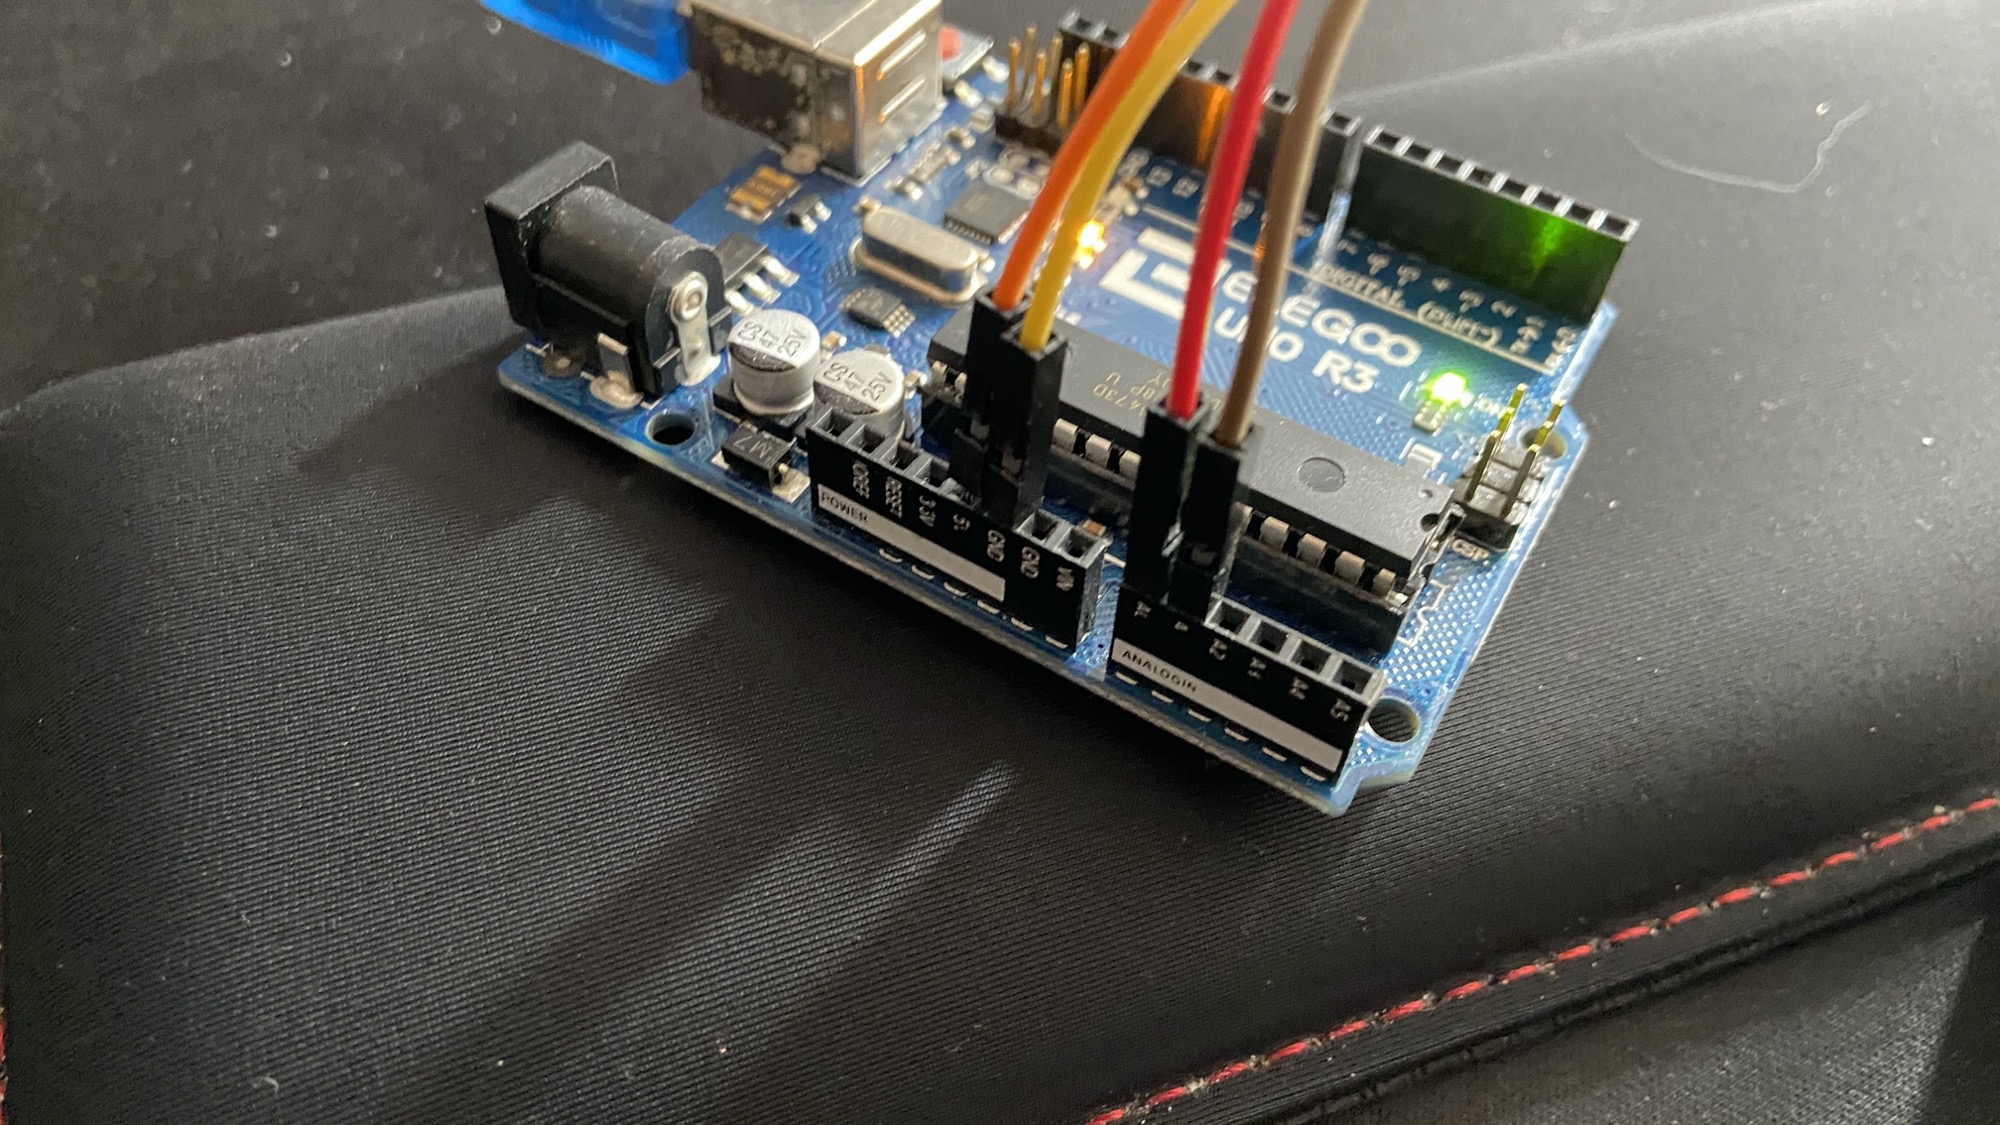
Pin #3 (x) goes to A0 and pin #4 (y) goes to A1:
Connect the Arduino to the computer via the USB port now; we’re going to work on the Node.js Johnny Five program in the next lesson.
Make sure you have already loaded the StandardFirmataPlus program on the Arduino board using the Arduino IDE, as I explain in the Johnny Five Tutorial.
The Johnny Five Node.js app
Let’s initialize our Johnny Five app.
Create a joystick.js file.
Add
const { Board, Joystick } = require("johnny-five")on top.
Initialize a board, and add board ready event:
const { Board, Joystick } = require("johnny-five")
const board = new Board()

board.on("ready", () => {
  //ready!
})
Now initialise a new joystick object, telling it which input pins we’re going to use for input X and Y:
const { Board, Joystick } = require("johnny-five")
const board = new Board()

board.on("ready", () => {
  const joystick = new Joystick({
    pins: ["A0", "A1"],
  })
})
Now we can start listening on the change event on the joystick object. When a change happens, we can get the x and y coordinates by referencing this.x and this.y, like this:
joystick.on("change", function () {
  console.log("x : ", this.x)
  console.log("y : ", this.y)
})
Here’s the full code in action:
const { Board, Joystick } = require("johnny-five")
const board = new Board()

board.on("ready", () => {
  const joystick = new Joystick({
    pins: ["A0", "A1"],
  })

  joystick.on("change", function () {
    console.log("x : ", this.x)
    console.log("y : ", this.y)
  })
})
If you start this program using node joystick.js you’ll see lots of values being printed to the console when you move the joystick around:
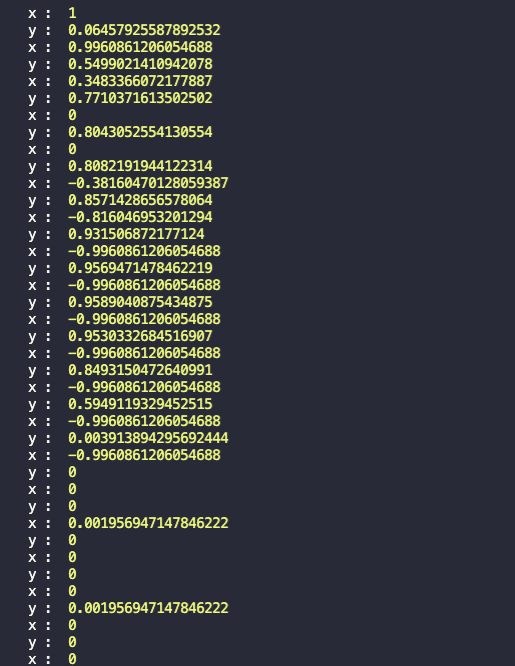
Great!
Now let’s try to make more sense out of this data.
The position 0 is where the joystick is still, untouched.
I want to detect the “right” movement when X is higher than 0.5, and “left” when X is lower than -0.5.
Same for the Y axis. In other words, I want to only trigger a movement when the joystick goes outside a certain gray zone:
This is how we can do this:
const { Board, Joystick } = require("johnny-five")
const board = new Board()
board.on("ready", () => {
const joystick = new Joystick({
pins: ["A0", "A1"],
})
joystick.on("change", function () {
if (this.x > 0.5) {
console.log("right")
}
if (this.x < -0.5) {
console.log("left")
}
if (this.x > -0.5 && this.x < 0.5) {
console.log("still")
}
if (this.y > 0.5) {
console.log("down")
}
if (this.y < -0.5) {
console.log("up")
}
})
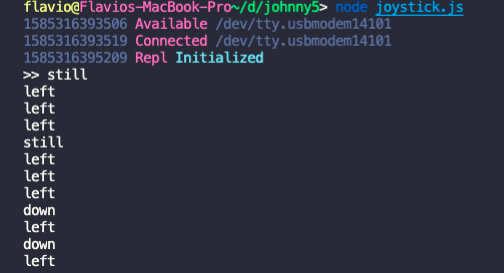
})Try running the program, and you’ll see the left/right/up/down/still words being printed instead of the actual coordinates numbers:
Create a Websockets Server
Now the question is this: how can we communicate between the game running in the browser, and our hardware project?
Since the app is working locally, the idea I had was to create a WebSocket connection between the browser and the Node.js Johnny Five process.
The Node.js app will be the WebSocket server, and the browser will connect to it.
Then, the server will send messages when the joystick is moved.
Let’s work on the WebSocket server now.
First install the ws npm package:
npm install wsWhen the board is ready, we initialize the joystick object and a new WebSocket server. I’ll use port 8085.
const { Board, Joystick } = require('johnny-five')
const board = new Board()

board.on('ready', () => {
  const joystick = new Joystick({
    pins: ['A0', 'A1']
  })
  const WebSocket = require('ws')
  const wss = new WebSocket.Server({ port: 8085 })
})
Next, we add an event listener that fires when a client connects to the WebSocket server:
wss.on('connection', ws => {

})
Inside here, we’ll start listening for the change event on the joystick object, like we did in the last lesson, and in addition to printing to the console, we’ll send a message to the client using the ws.send() method:
const { Board, Joystick } = require('johnny-five')
const board = new Board()

board.on('ready', () => {
  const joystick = new Joystick({
    pins: ['A0', 'A1']
  })

  const WebSocket = require('ws')
  const wss = new WebSocket.Server({ port: 8085 })

  wss.on('connection', ws => {
    ws.on('message', message => {
      console.log(`Received message => ${message}`)
    })

    joystick.on('change', function() {
      if (this.x > 0.5) {
        console.log('->')
        ws.send('right')
      }
      if (this.x < -0.5) {
        console.log('<-')
        ws.send('left')
      }
      if (this.x > -0.5 && this.x < 0.5 ) {
        console.log('still')
        ws.send('still')
      }
      if (this.y > 0.5) {
        console.log('down')
      }
      if (this.y < -0.5) {
        console.log('up')
        ws.send('jump')
      }
    })
  })
})
Connect to the Websockets server from the game
If you are not familiar with the platform game I built in the Games level, check it out first.
The game is all built in one single app.js file, which uses the Phaser.js framework.
We have 2 main functions: create() and update().
At the end of the create() function, I’m going to connect to the Websockets server:
const url = 'ws://localhost:8085'
connection = new WebSocket(url)

connection.onerror = error => {
  console.error(error)
}
We also need to initialize let connection at the top of the file, outside the function, because we’re going to reference that variable in the update() function, too.
I hardcoded the URL to the WebSocket server, because it’s a local server and this would not work outside of a single, local scenario.
There’s only one joystick, after all, but it’s great for testing things out.
If there’s any error during the connection, we’d see an error here.
In the update() function, now we have this code:
function update() {
  if (cursors.left.isDown) {
    player.setVelocityX(-160)
    player.anims.play('left')
  } else if (cursors.right.isDown) {
    player.setVelocityX(160)
    player.anims.play('right')
  } else {
    player.setVelocityX(0)
    player.anims.play('still')
  }

  if (cursors.up.isDown && player.body.touching.down) {
    player.setVelocityY(-330)
  }
}
I’m going to change this all, because instead of controlling the player movement using the keyboard, we’re going to use the joystick.
We’ll listen to the message event on the connection object:
function update() {
  connection.onmessage = e => {

  }
}
The e object passed to the callback stands for “event” and we can get the data sent by the server on its data property:
function update() {
  connection.onmessage = e => {
    console.log(e.data)
  }
}
Now we can detect the message sent, and we can move the player accordingly:
connection.onmessage = e => {
  if (e.data === 'left') {
    player.setVelocityX(-160)
    player.anims.play('left')
  }
  if (e.data === 'right') {
    player.setVelocityX(160)
    player.anims.play('right')
  }
  if (e.data === 'still') {
    player.setVelocityX(0)
    player.anims.play('still')
  }
  if (e.data === 'jump' && player.body.touching.down) {
    player.setVelocityY(-330)
  }
}
That’s it! Now our joystick will move the player on the screen!
Alternative using WebUSB
The Node.js server with Websockets is a good cross-browser way to solve the connection problem.
Another way is to use WebUSB, a technology that’s only available on Chromium-based browsers like Chrome, Edge and others.
Using this, we can make pages detect a device and they can talk to it directly.
To do so, we must ask the user to perform an action, like pressing a “Connect” button like the one I added to the game index.html file:
<!DOCTYPE html>
<html>
  <head>
    <script src="./dist/app.js"></script>
  </head>
  <body>
    <button id="connect">Connect</button>
  </body>
</html>
(the rest of the game is appended to the body in a
canvastag automatically)
This time I used an Arduino MKR WiFi 1010 device because WebUSB does not support the Arduino Uno board, for technical reasons.
I connected the joystick to that board, using the same wiring we used in the previous lessons:
To configure the Arduino to play well with WebUSB I recommend you to read https://webusb.github.io/arduino/.
Here is the Arduino sketch, written in the Arduino Language (C++) this time, instead of Johnny Five:
#include <WebUSB.h>
WebUSB WebUSBSerial(1 /* http:// */, "localhost:3000"); //provide a hint at what page to load

#define Serial WebUSBSerial

const int xpin = 0;
const int ypin = 1;

void loop() {
  if (Serial) {

    int x = analogRead(xpin);
    int y = analogRead(ypin);

    bool still = false;

    if (x > 768) {
      still = false;
      Serial.println('R');
    }
    if (x < 256) {
      still = false;
      Serial.println('L');
    }
    if (x > 256 && x < 768 ) {
      if (!still) {
        still = true;
        Serial.println('S');
      }
    }
    if (y < 256) {
      Serial.println('J');
    }
  }
}
It is very similar to the program we built in Node.js previously.
This time however we communicate a letter to the Web page using the WebUSBSerial interface defined by WebUSB.
We send letters: R for right, L for left, S for still, and J for jump.
I added a still boolean to prevent the letter S from being sent too many times unnecessarily. In this way we only send it once when we return to a still state.
On the Web page side, I added a serial.js file that is used to abstract a lot of the low level code we don’t need to worry about. I found it in the WebUSB Arduino demos https://webusb.github.io/arduino/demos/serial.js and I adapted it to be an ES Module file, by removing the IIFE (immediately-invoked function) and added an export default serial at the end:
const serial = {}

serial.getPorts = function () {
  return navigator.usb.getDevices().then((devices) => {
    return devices.map((device) => new serial.Port(device))
  })
}

serial.requestPort = function () {
  const filters = [
    { vendorId: 0x2341, productId: 0x8036 }, // Arduino Leonardo
    { vendorId: 0x2341, productId: 0x8037 }, // Arduino Micro
    { vendorId: 0x2341, productId: 0x804d }, // Arduino/Genuino Zero
    { vendorId: 0x2341, productId: 0x804e }, // Arduino/Genuino MKR1000
    { vendorId: 0x2341, productId: 0x804f }, // Arduino MKRZERO
    { vendorId: 0x2341, productId: 0x8050 }, // Arduino MKR FOX 1200
    { vendorId: 0x2341, productId: 0x8052 }, // Arduino MKR GSM 1400
    { vendorId: 0x2341, productId: 0x8053 }, // Arduino MKR WAN 1300
    { vendorId: 0x2341, productId: 0x8054 }, // Arduino MKR WiFi 1010
    { vendorId: 0x2341, productId: 0x8055 }, // Arduino MKR NB 1500
    { vendorId: 0x2341, productId: 0x8056 }, // Arduino MKR Vidor 4000
    { vendorId: 0x2341, productId: 0x8057 }, // Arduino NANO 33 IoT
    { vendorId: 0x239a }, // Adafruit Boards!
  ]
  return navigator.usb
    .requestDevice({ filters: filters })
    .then((device) => new serial.Port(device))
}

serial.Port = function (device) {
  this.device_ = device
  this.interfaceNumber_ = 2 // original interface number of WebUSB Arduino demo
  this.endpointIn_ = 5 // original in endpoint ID of WebUSB Arduino demo
  this.endpointOut_ = 4 // original out endpoint ID of WebUSB Arduino demo
}

serial.Port.prototype.connect = function () {
  let readLoop = () => {
    this.device_.transferIn(this.endpointIn_, 64).then(
      (result) => {
        this.onReceive(result.data)
        readLoop()
      },
      (error) => {
        this.onReceiveError(error)
      }
    )
  }

  return this.device_
    .open()
    .then(() => {
      if (this.device_.configuration === null) {
        return this.device_.selectConfiguration(1)
      }
    })
    .then(() => {
      var configurationInterfaces = this.device_.configuration.interfaces
      configurationInterfaces.forEach((element) => {
        element.alternates.forEach((elementalt) => {
          if (elementalt.interfaceClass == 0xff) {
            this.interfaceNumber_ = element.interfaceNumber
            elementalt.endpoints.forEach((elementendpoint) => {
              if (elementendpoint.direction == "out") {
                this.endpointOut_ = elementendpoint.endpointNumber
              }
              if (elementendpoint.direction == "in") {
                this.endpointIn_ = elementendpoint.endpointNumber
              }
            })
          }
        })
      })
    })
    .then(() => this.device_.claimInterface(this.interfaceNumber_))
    .then(() => this.device_.selectAlternateInterface(this.interfaceNumber_, 0))
    .then(() =>
      this.device_.controlTransferOut({
        requestType: "class",
        recipient: "interface",
        request: 0x22,
        value: 0x01,
        index: this.interfaceNumber_,
      })
    )
    .then(() => {
      readLoop()
    })
}

serial.Port.prototype.disconnect = function () {
  return this.device_
    .controlTransferOut({
      requestType: "class",
      recipient: "interface",
      request: 0x22,
      value: 0x00,
      index: this.interfaceNumber_,
    })
    .then(() => this.device_.close())
}

serial.Port.prototype.send = function (data) {
  return this.device_.transferOut(this.endpointOut_, data)
}

export default serial
In app.js I include this file at the top:
import serial from "./serial.js"and since now we have a button, I added a DOMContentLoaded event listener:
document.addEventListener('DOMContentLoaded', () => {

}
I wrapped everything that was in the file, except the import statements, inside it.
Next I add a reference to the Connect button:
let connectButton = document.querySelector("#connect")and a port variable that we’ll later initialize:
let portAt the end of the create() function, we immediately ask the serial object for paired devices and call connect() if one device is already paired.
I add a click event listener on the Connect button. When we click that button, we’ll request the connection to a device.
connectButton.addEventListener("click", () => {
  if (port) {
    port.disconnect()
    connectButton.textContent = "Connect"
    port = null
  } else {
    serial.requestPort().then((selectedPort) => {
      port = selectedPort
      port.connect().then(() => {
        connectButton.remove()
      })
    })
  }
})
Our request must be triggered by a user action, like a click; otherwise the browser will deny the request.
When the user presses the button the browser asks the permission to connect:
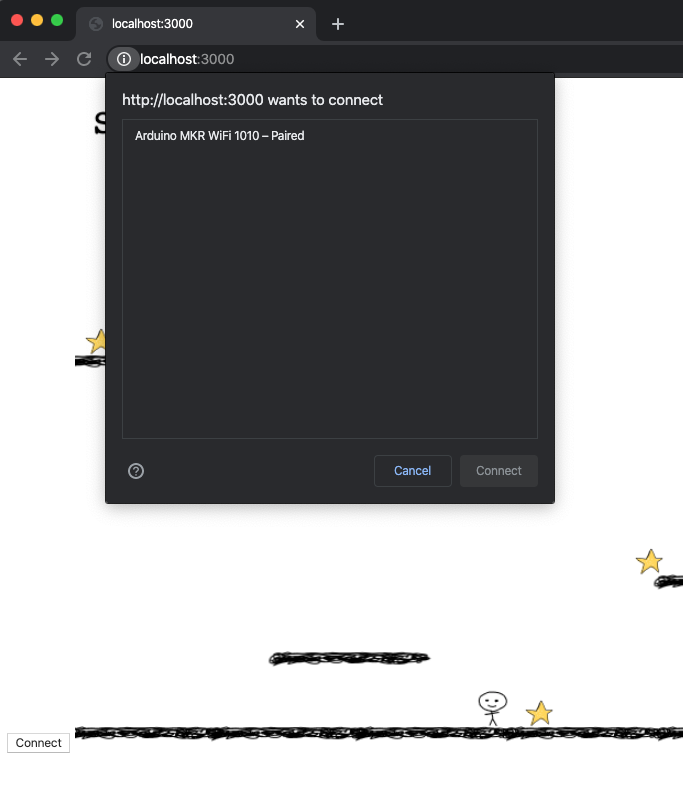
And once the permission is granted, we can control the game using the Joystick!
Here is the new update() function that handles the data from the device. We attach a function to the onReceive property of the port object. It is called when a new message arrives, and we handle the letters sent to us:
function update() {
  if (port) {
    port.onReceive = (data) => {
      let textDecoder = new TextDecoder()
      let key = textDecoder.decode(data)

      if (key === "L") {
        player.setVelocityX(-160)
        player.anims.play("left")
      }
      if (key === "R") {
        player.setVelocityX(160)
        player.anims.play("right")
      }
      if (key === "S") {
        player.setVelocityX(0)
        player.anims.play("still")
      }
      if (key === "J" && player.body.touching.down) {
        player.setVelocityY(-330)
      }
    }
    port.onReceiveError = (error) => {
      console.error(error)
    }
  }
}
That’s it! We can now play the game like before, when we used Websockets, except now we don’t need an external Node.js server - the connection happens directly between the browser and the device.
Lessons in this unit:
| 0: | Introduction |
| 1: | Tutorial |
| 2: | How to use a REPL |
| 3: | How to light a LED |
| 4: | How to work with an LCD Screen |
| 5: | Receiving input from the device |
| 6: | ▶︎ Control a browser game with Arduino and a joystick |