Join the AI Workshop and learn to build real-world apps with AI. A hands-on, practical program to level up your skills.
HTMX lets us create an HTTP request pretty easily using hx-get or hx-post, etc.
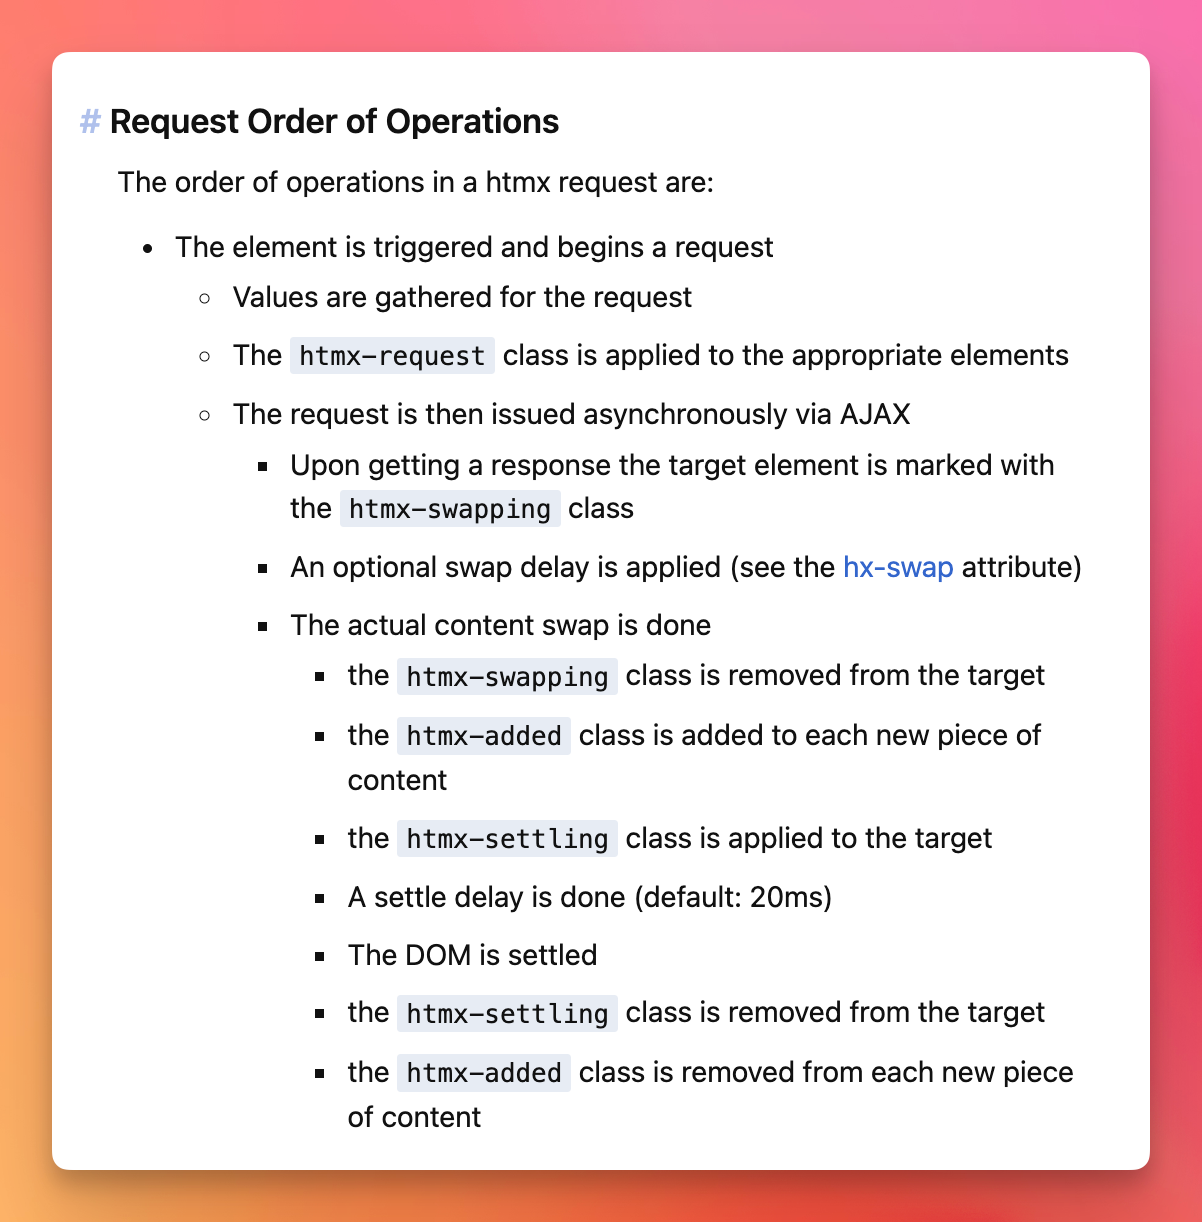
The request lifecycle goes through a set of stages: settling, request, swapping, added (see https://htmx.org/docs/#request-operations)
Each time the state changes, HTMX adds a class to the element:
htmx-indicatorhtmx-addedhtmx-settlinghtmx-swapping
You can target those classes with CSS to add transitions or whatever to the elements based on the state of the request.
Using Tailwind CSS, you can use a “trick” to style those with variants.
You can configure variants in your tailwind.config.js file:
//...
  plugins: [
    plugin(function({ addVariant }) {
      addVariant('htmx-settling', ['&.htmx-settling', '.htmx-settling &'])
      addVariant('htmx-request', ['&.htmx-request', '.htmx-request &'])
      addVariant('htmx-swapping', ['&.htmx-swapping', '.htmx-swapping &'])
      addVariant('htmx-added', ['&.htmx-added', '.htmx-added &'])
    }),
  ],
//...
Now you can use those variants like this:
<button class="htmx-added:opacity-0 opacity-100 transition-opacity duration-1000">
  click this
</button>